 My Expense
Tutorial
From first launch to backups, in eleven short steps. Tap a step to open it.
1. First-time setup
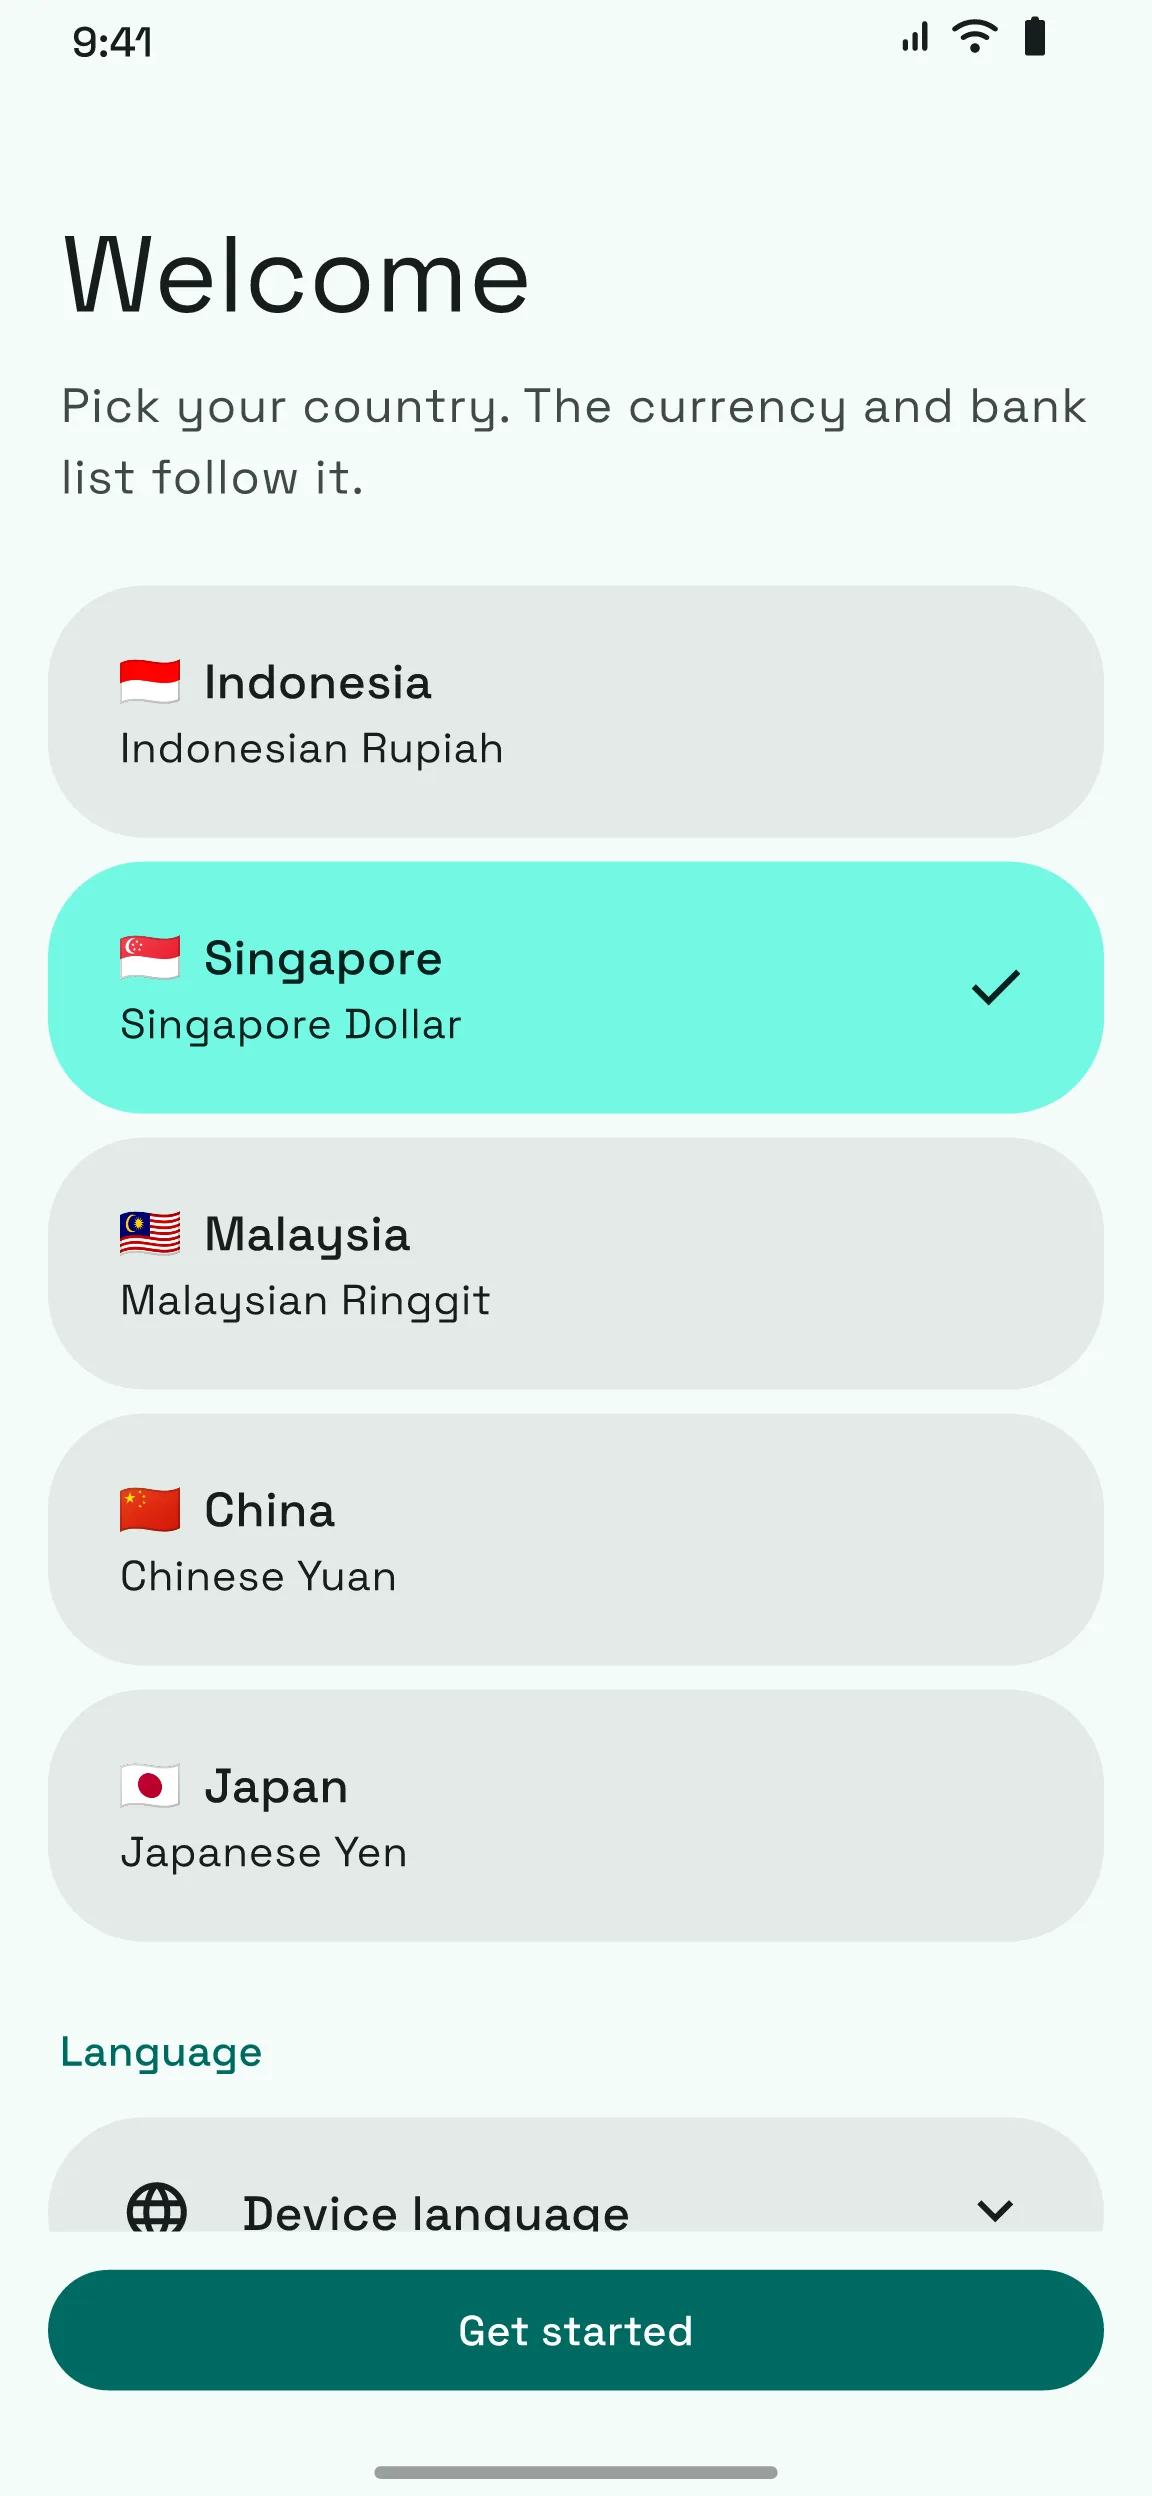
Choose your country and language
Welcome is a single page. Pick your country: it sets the currency, the number format and the list of banks and e-money you can choose from.
Choose a language if you do not want the device language, then tap Get started. You can change all of this later in Settings.
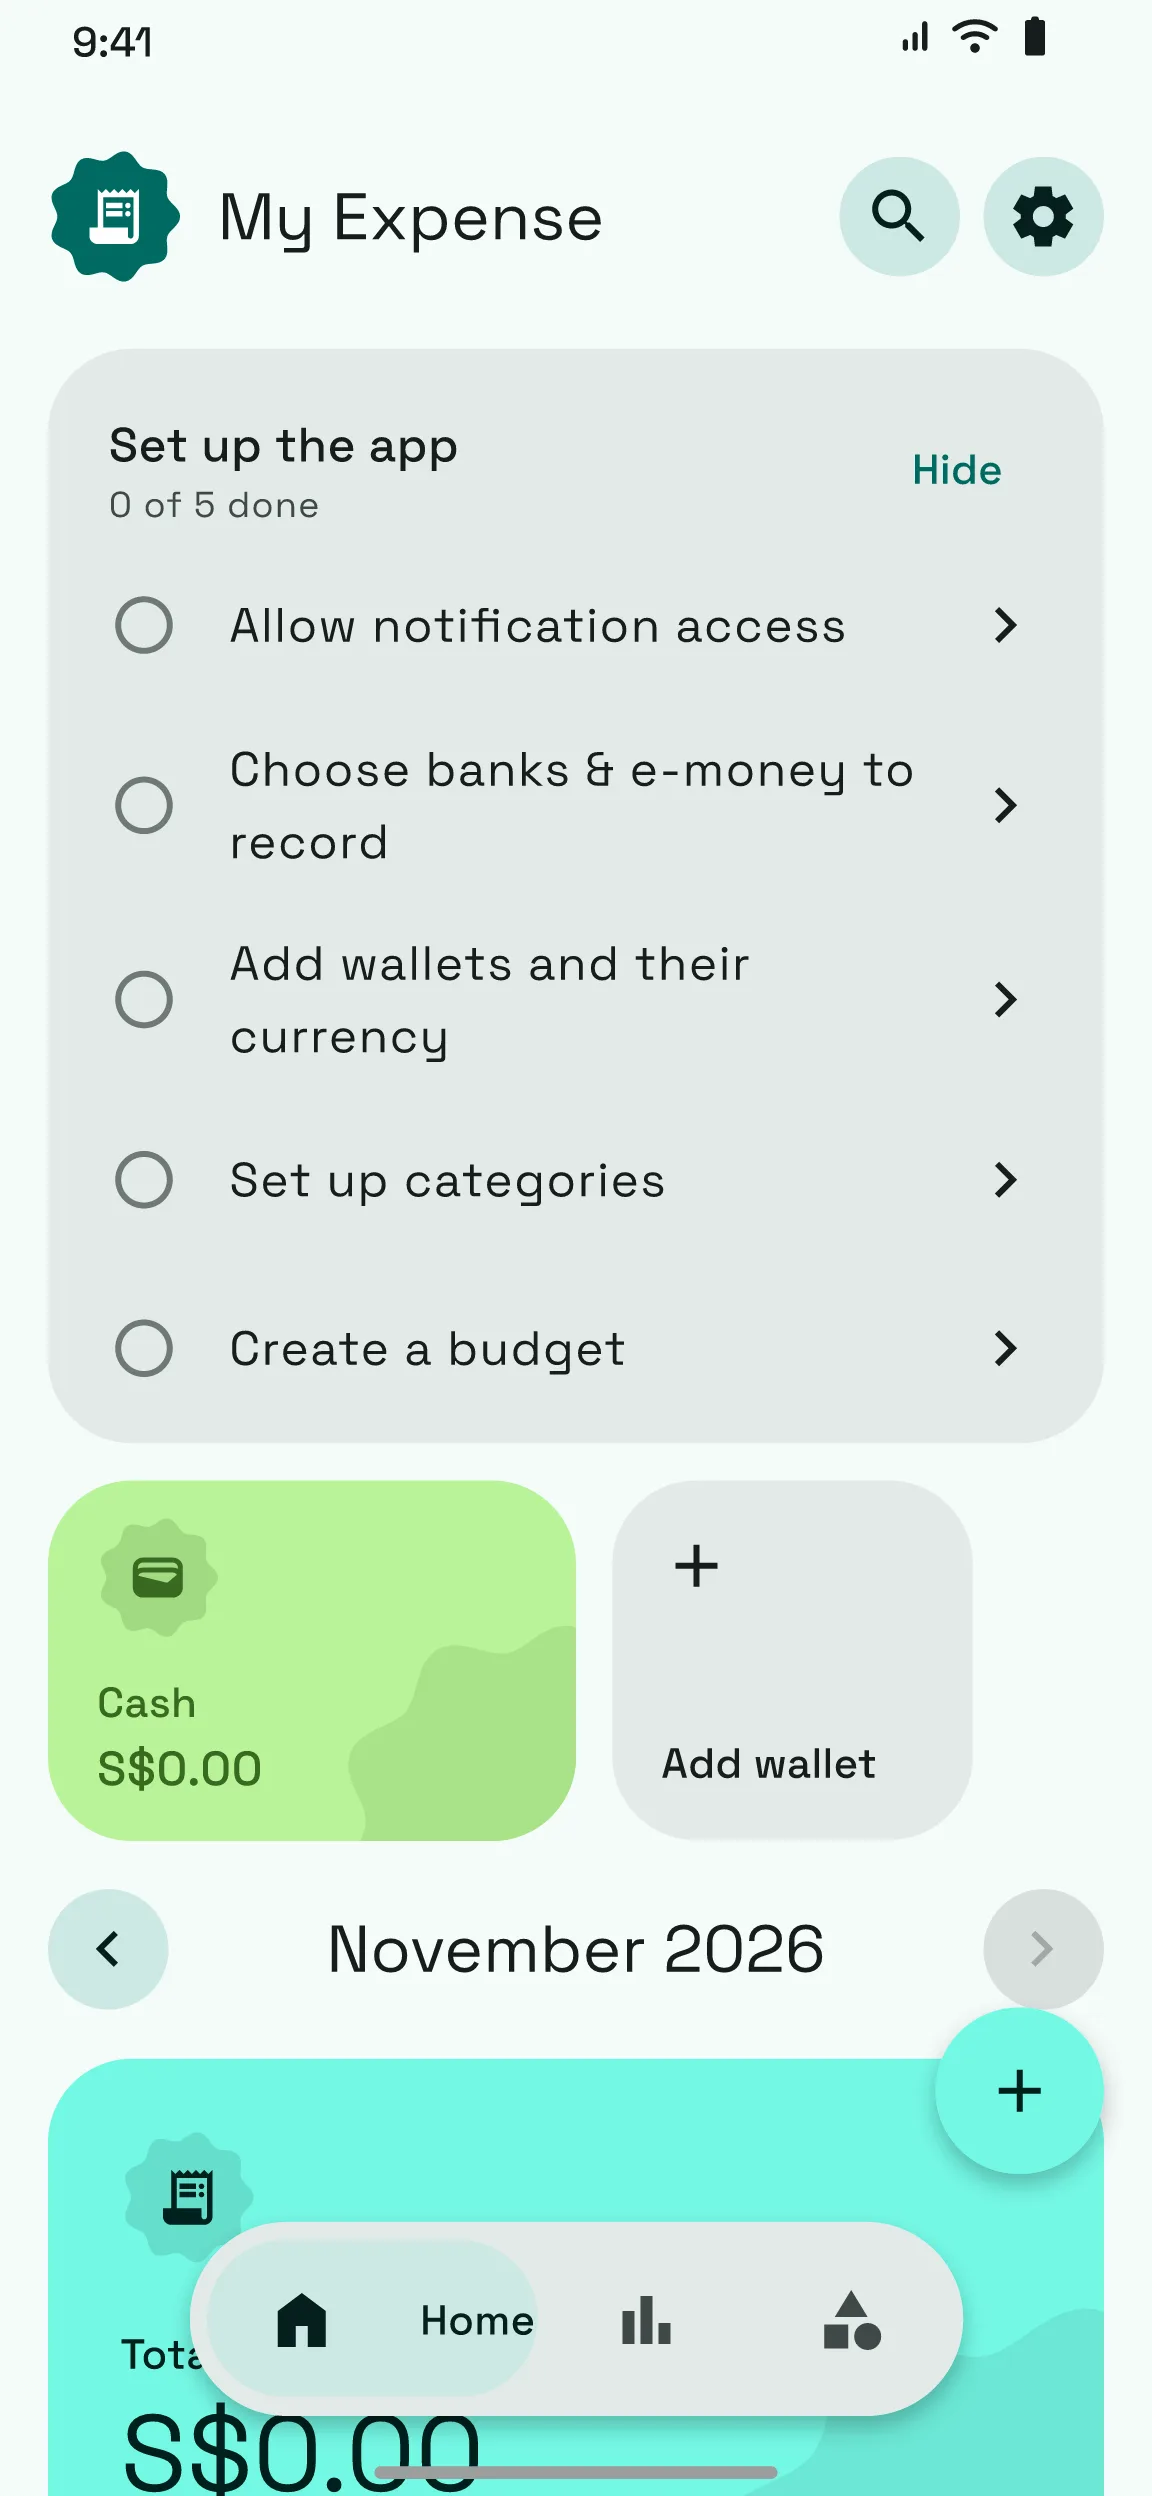
Follow the Set up the app checklist
Home then shows a card with five steps: allow notification access, choose banks and e-money, add wallets, set up categories and create a budget.
Tap any step to jump straight to it. The card counts what is done. Tap Hide when you have had enough.
2. Turn on automatic expenses
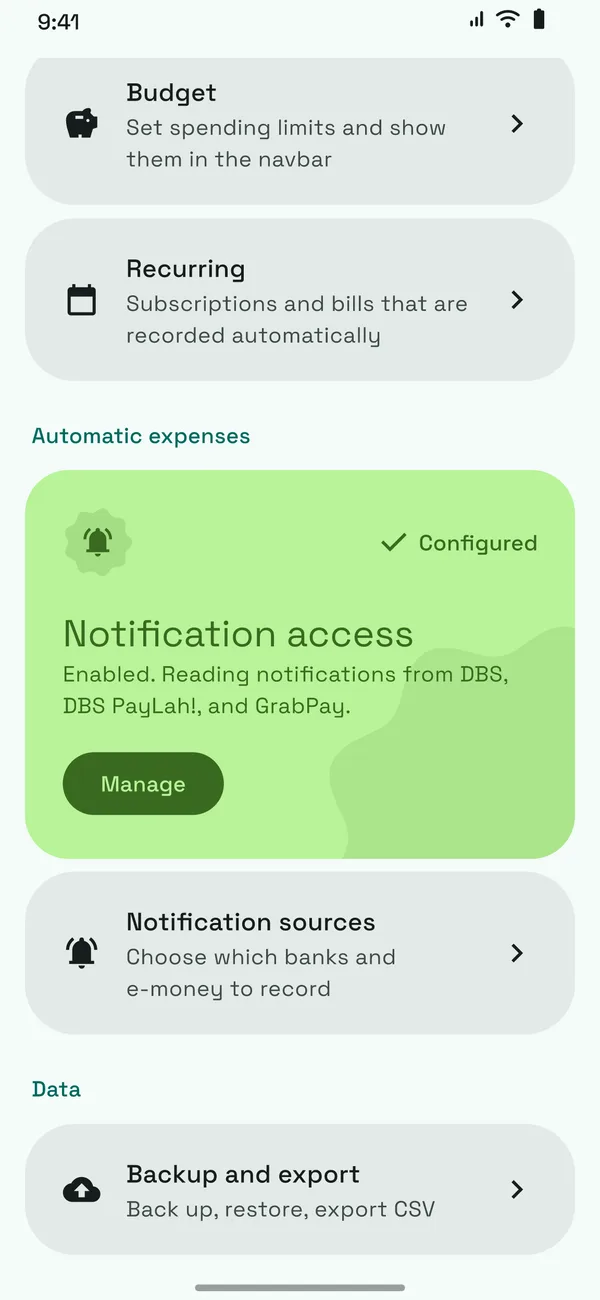
Allow notification access
Open Settings, then Automatic expenses, and tap Manage to grant notification access in Android. The card turns green and says Configured.
Without this permission nothing is recorded automatically. The app only reads payment notifications from the banks and e-money you choose next.
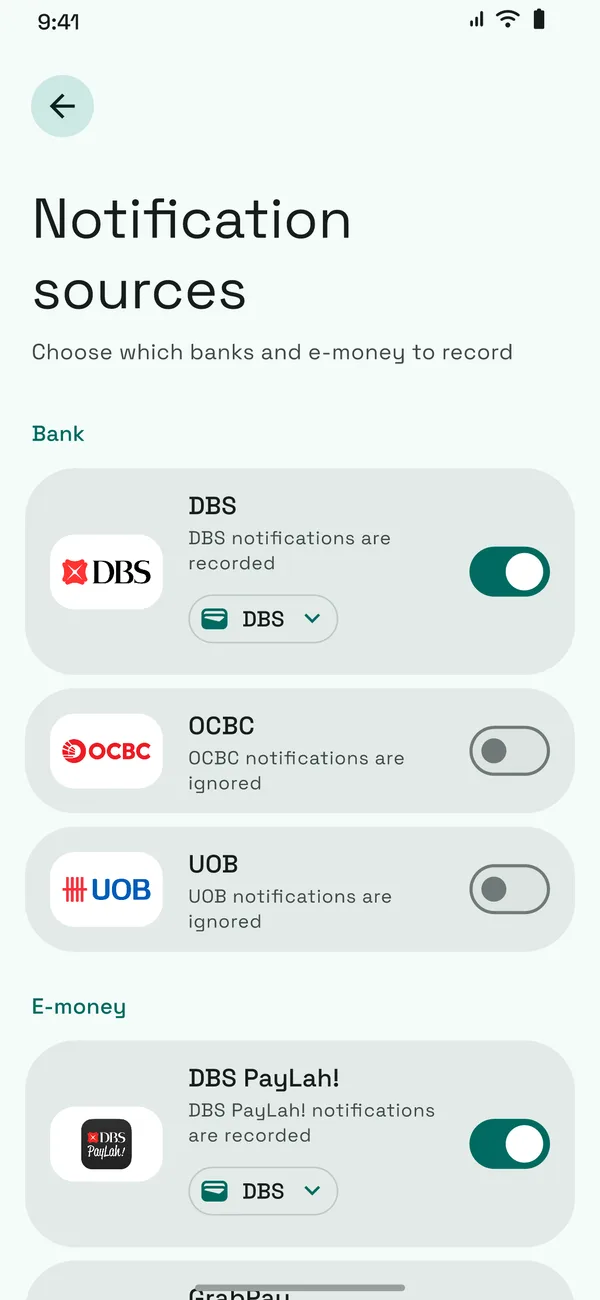
Pick your banks and e-money
Under Notification sources, switch on the banks and e-money you use and pick the wallet each one posts to. Sources you leave off are ignored.
A captured payment appears on Home for you to review. Incoming money and promotions wait in Ignored until you confirm them.
3. Add an expense by hand
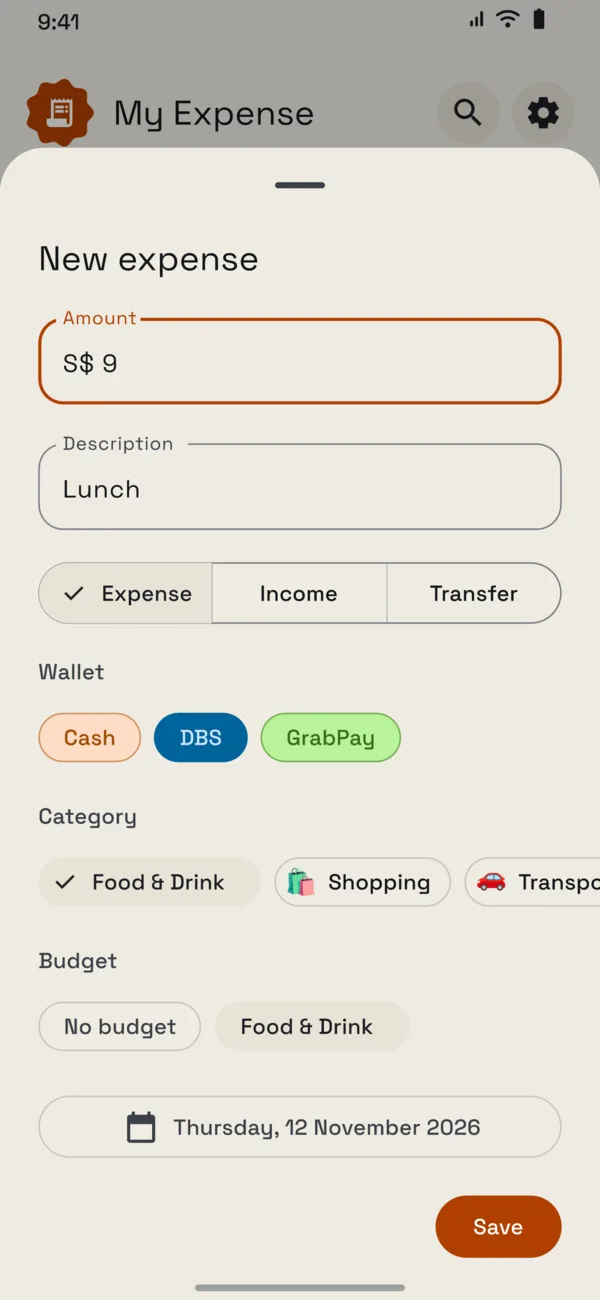
Fill in the form
Tap the + button on Home. Enter the amount and a description, choose Expense, Income or Transfer, then pick a wallet, a category and a date. Tap Save.
Quick input and Receipt scan also appear here once you switch them on in the AI assistant settings (step 9).
4. Read Home, search and history
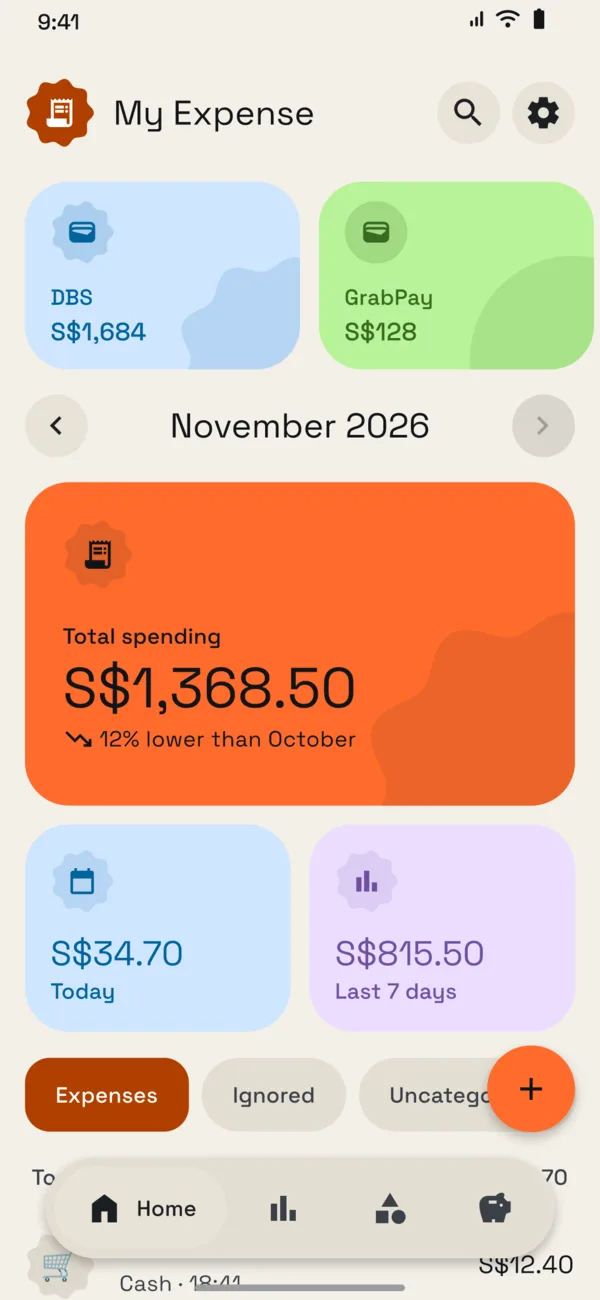
Home
Home shows your wallets, the month total with a comparison to last month, today and the last 7 days, then your transactions grouped by day.
Use the chips to switch between Expenses, Ignored and Uncategorized. Tap a transaction to change its amount, category, wallet or date.
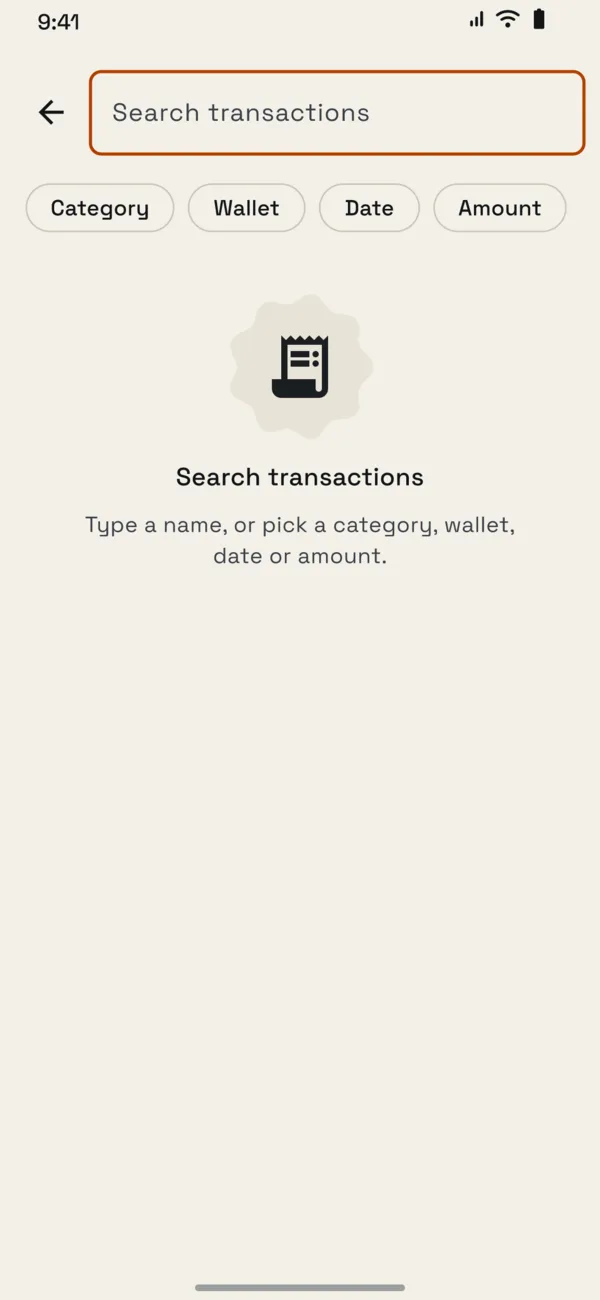
Search
Tap the magnifier on Home and type a name. The filters under the box narrow the result by category, wallet, date or amount.
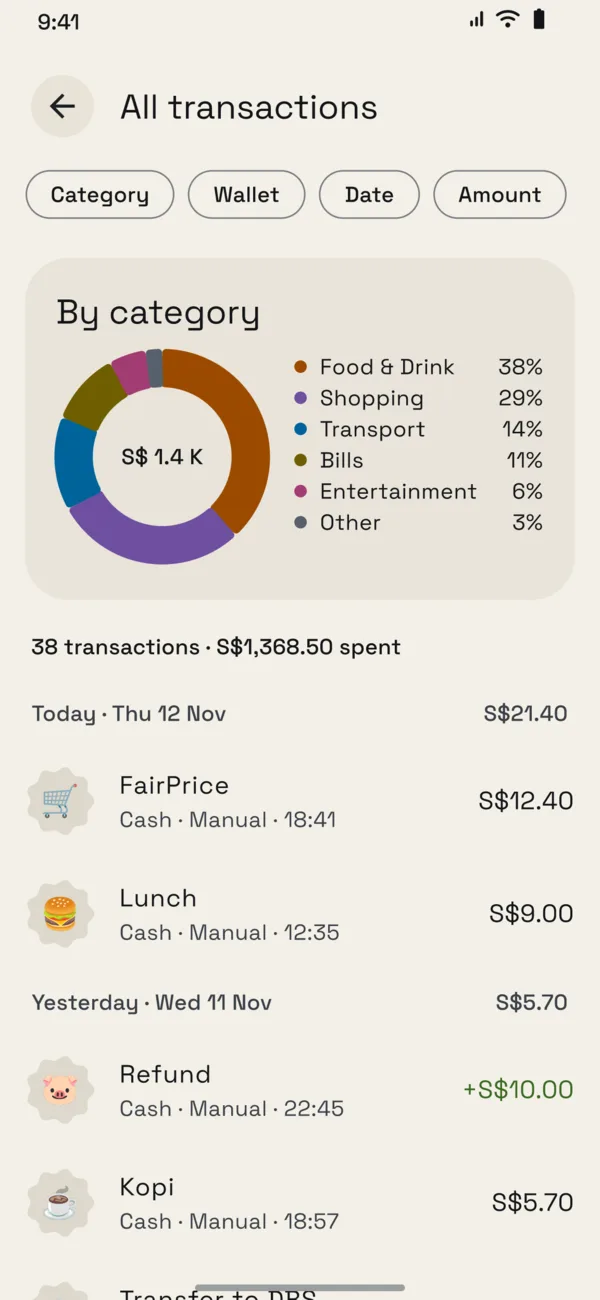
All transactions
Settings, then All transactions, lists the full history with the same filters, and a donut chart that splits what you see by category.
5. Understand the dashboard
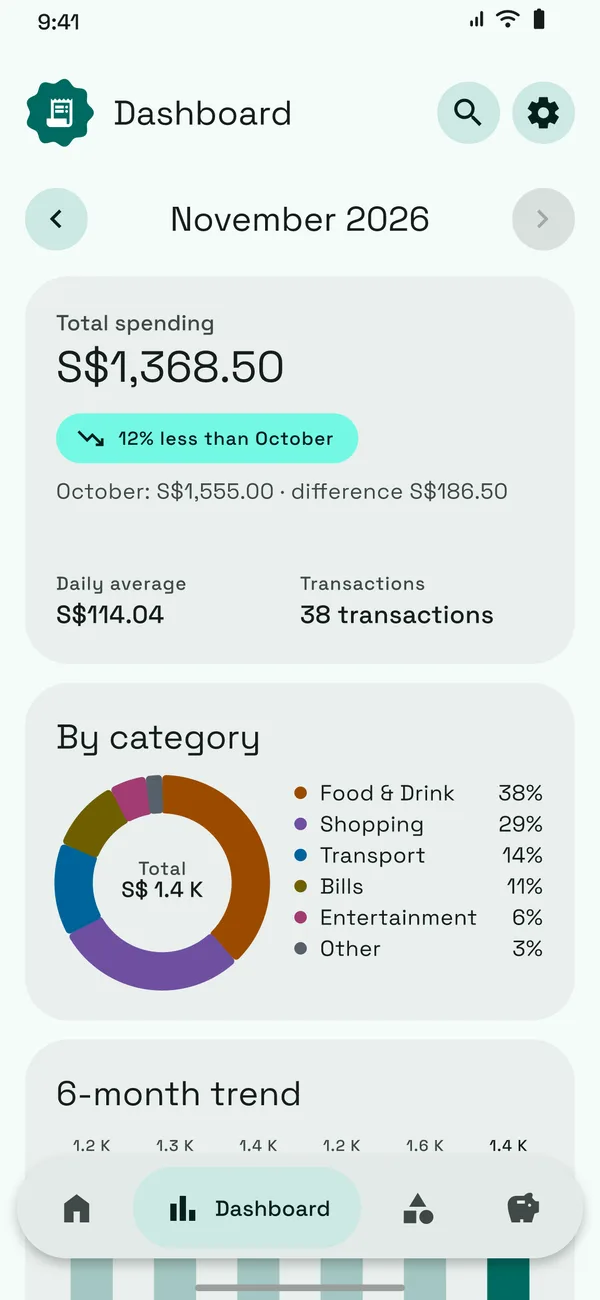
The dashboard
The dashboard compares the month with the one before, splits spending by category, shows a six-month trend and daily bars with your average, and ranks sources and top merchants.
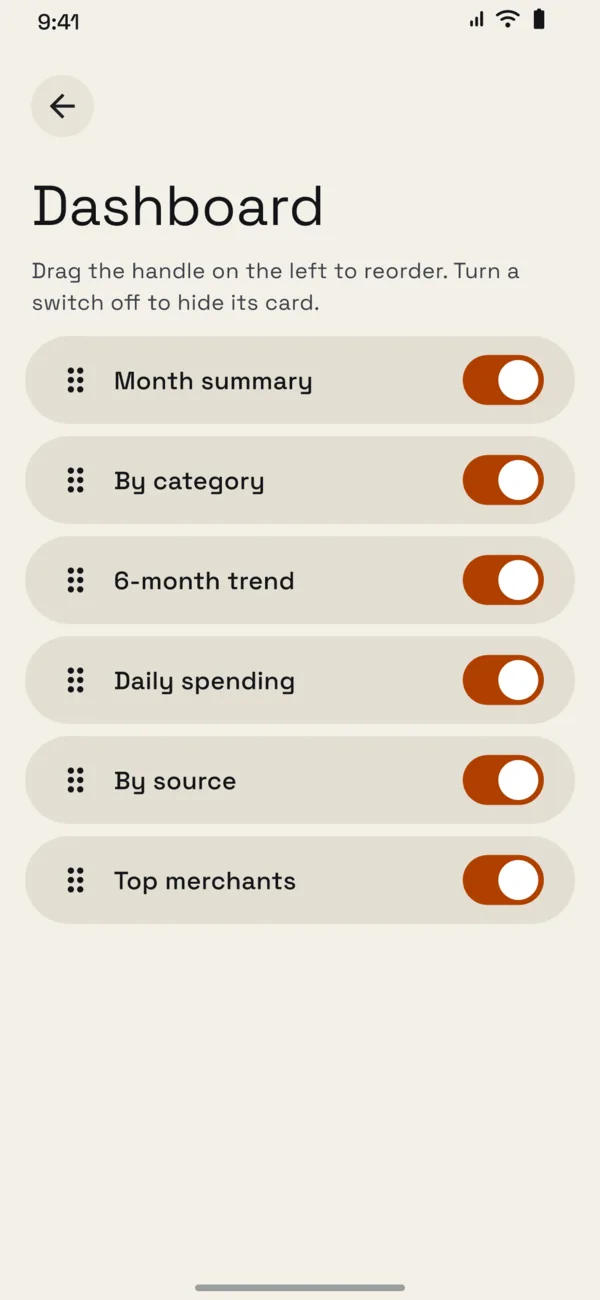
Choose and reorder cards
In Settings, Dashboard lets you drag cards into your own order and switch off the ones you do not need.
6. Categories and budgets
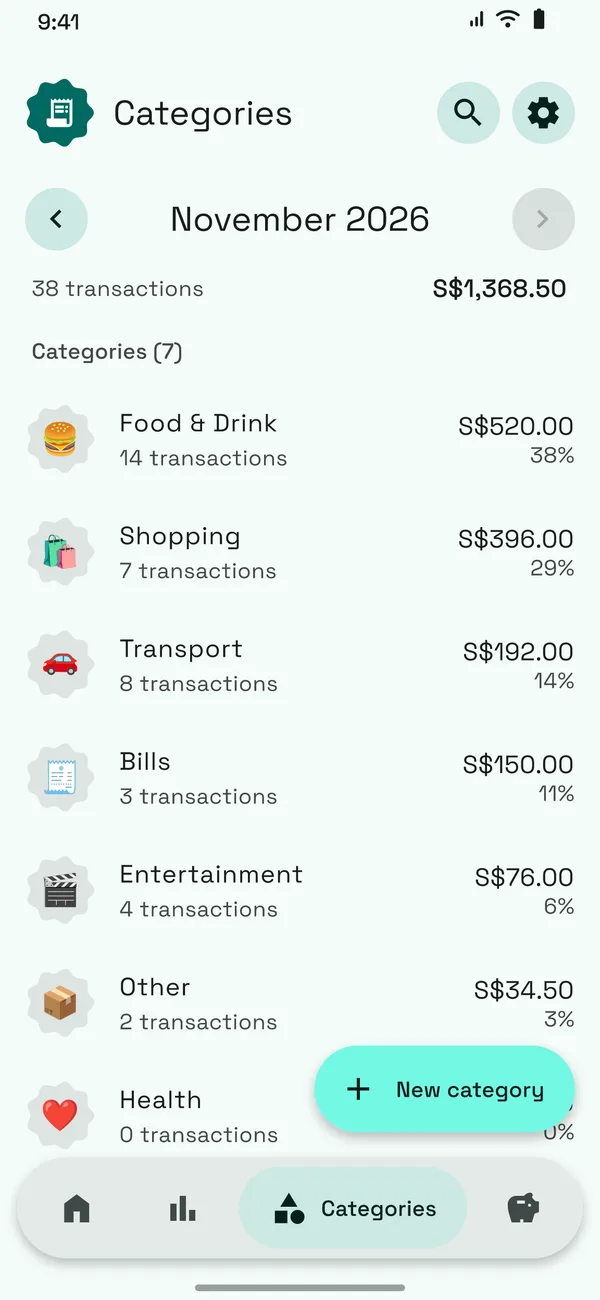
Categories
Categories lists every category with its total for the month. Tap one to edit its name, icon and color, or add your own with the button at the bottom.
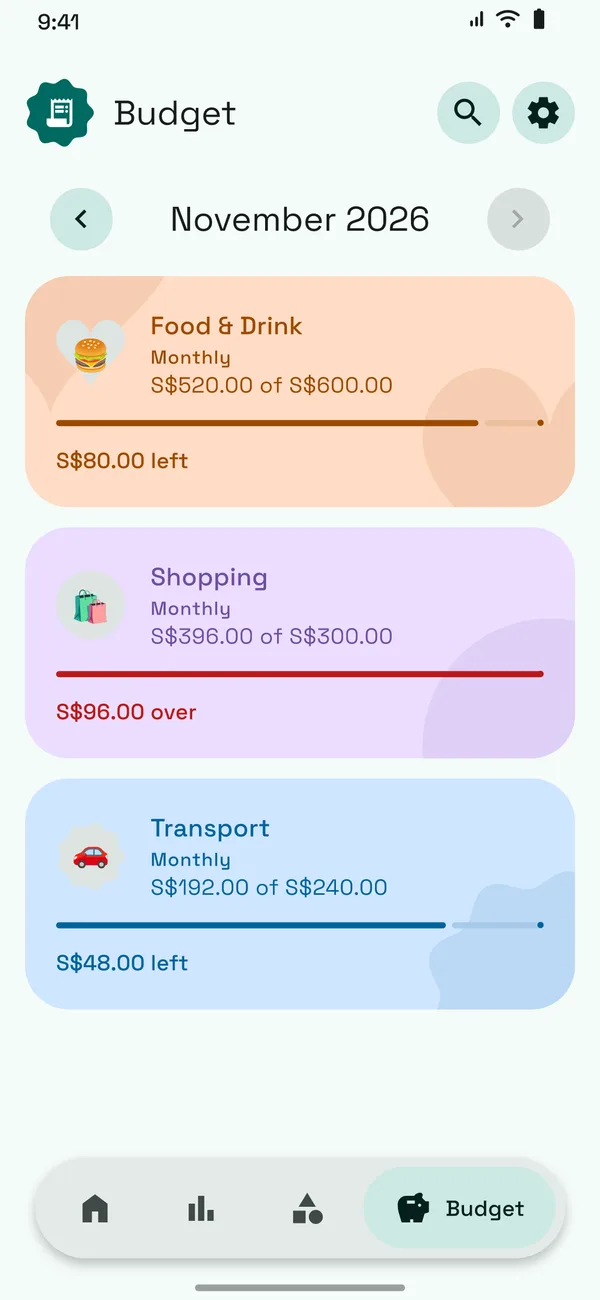
Budget tab
Each budget shows how much of its limit is spent this month, and turns red when a month runs over.
Create budgets
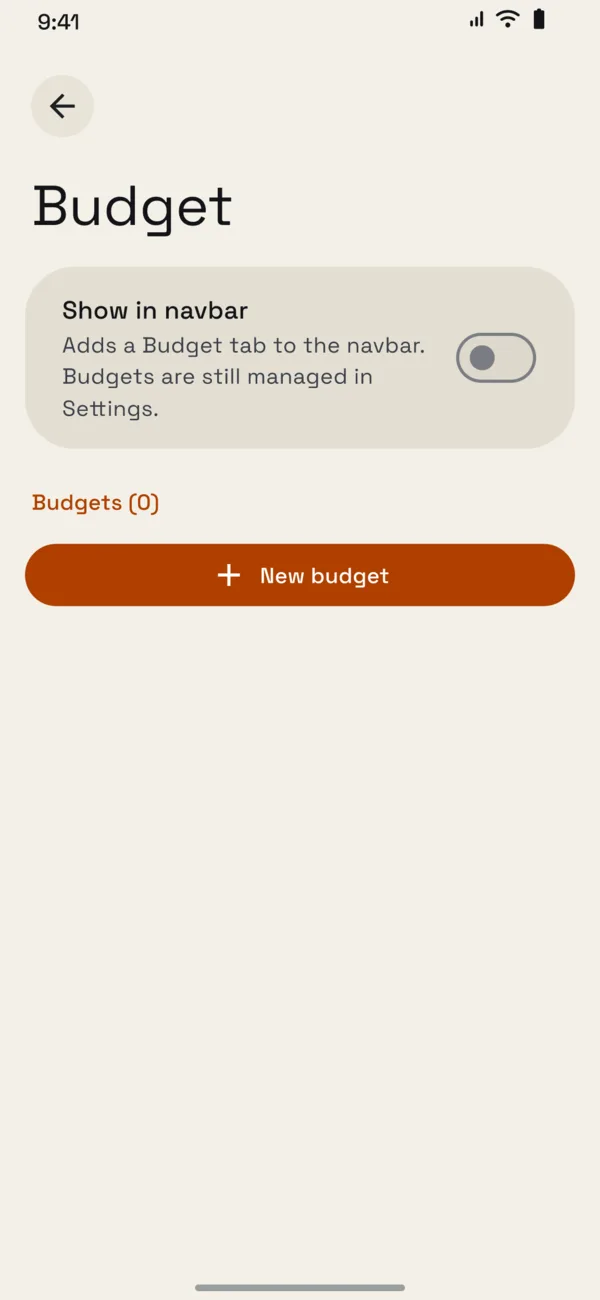
Create a budget per category under Settings, then Budget. Turn on Show in navbar to add a Budget tab next to Home and Dashboard.
7. Wallets and recurring items
Wallets
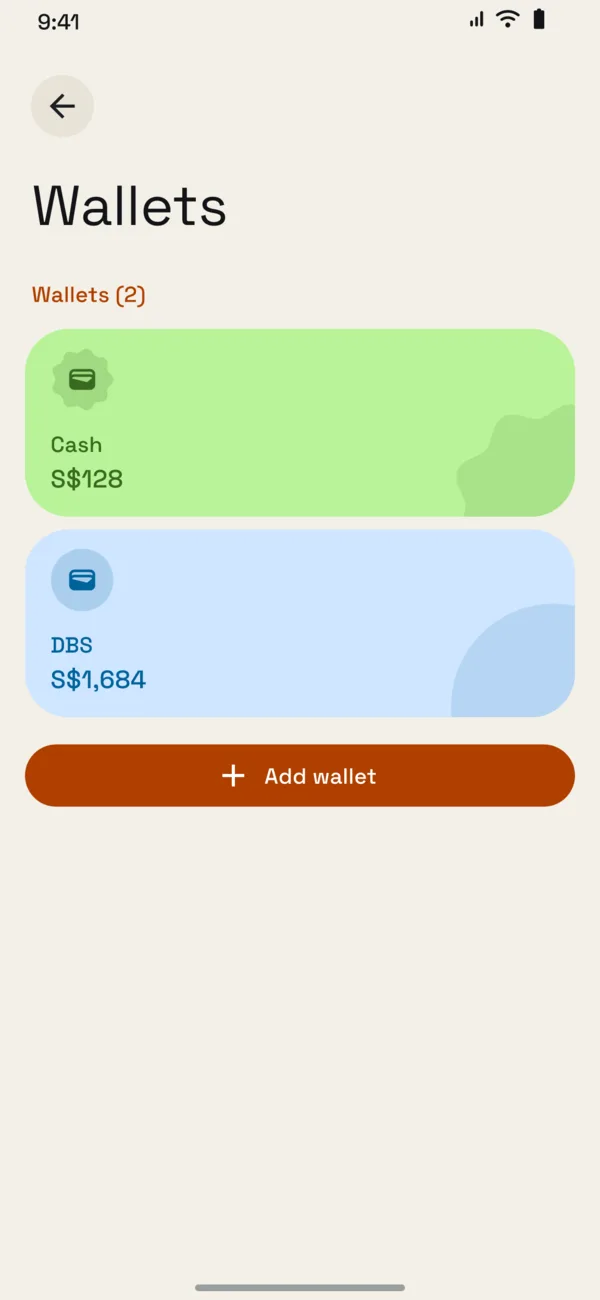
Wallets holds your accounts and cash. Tap Add wallet for another one, and move money between them with the Transfer type when you add a transaction.
Recurring items
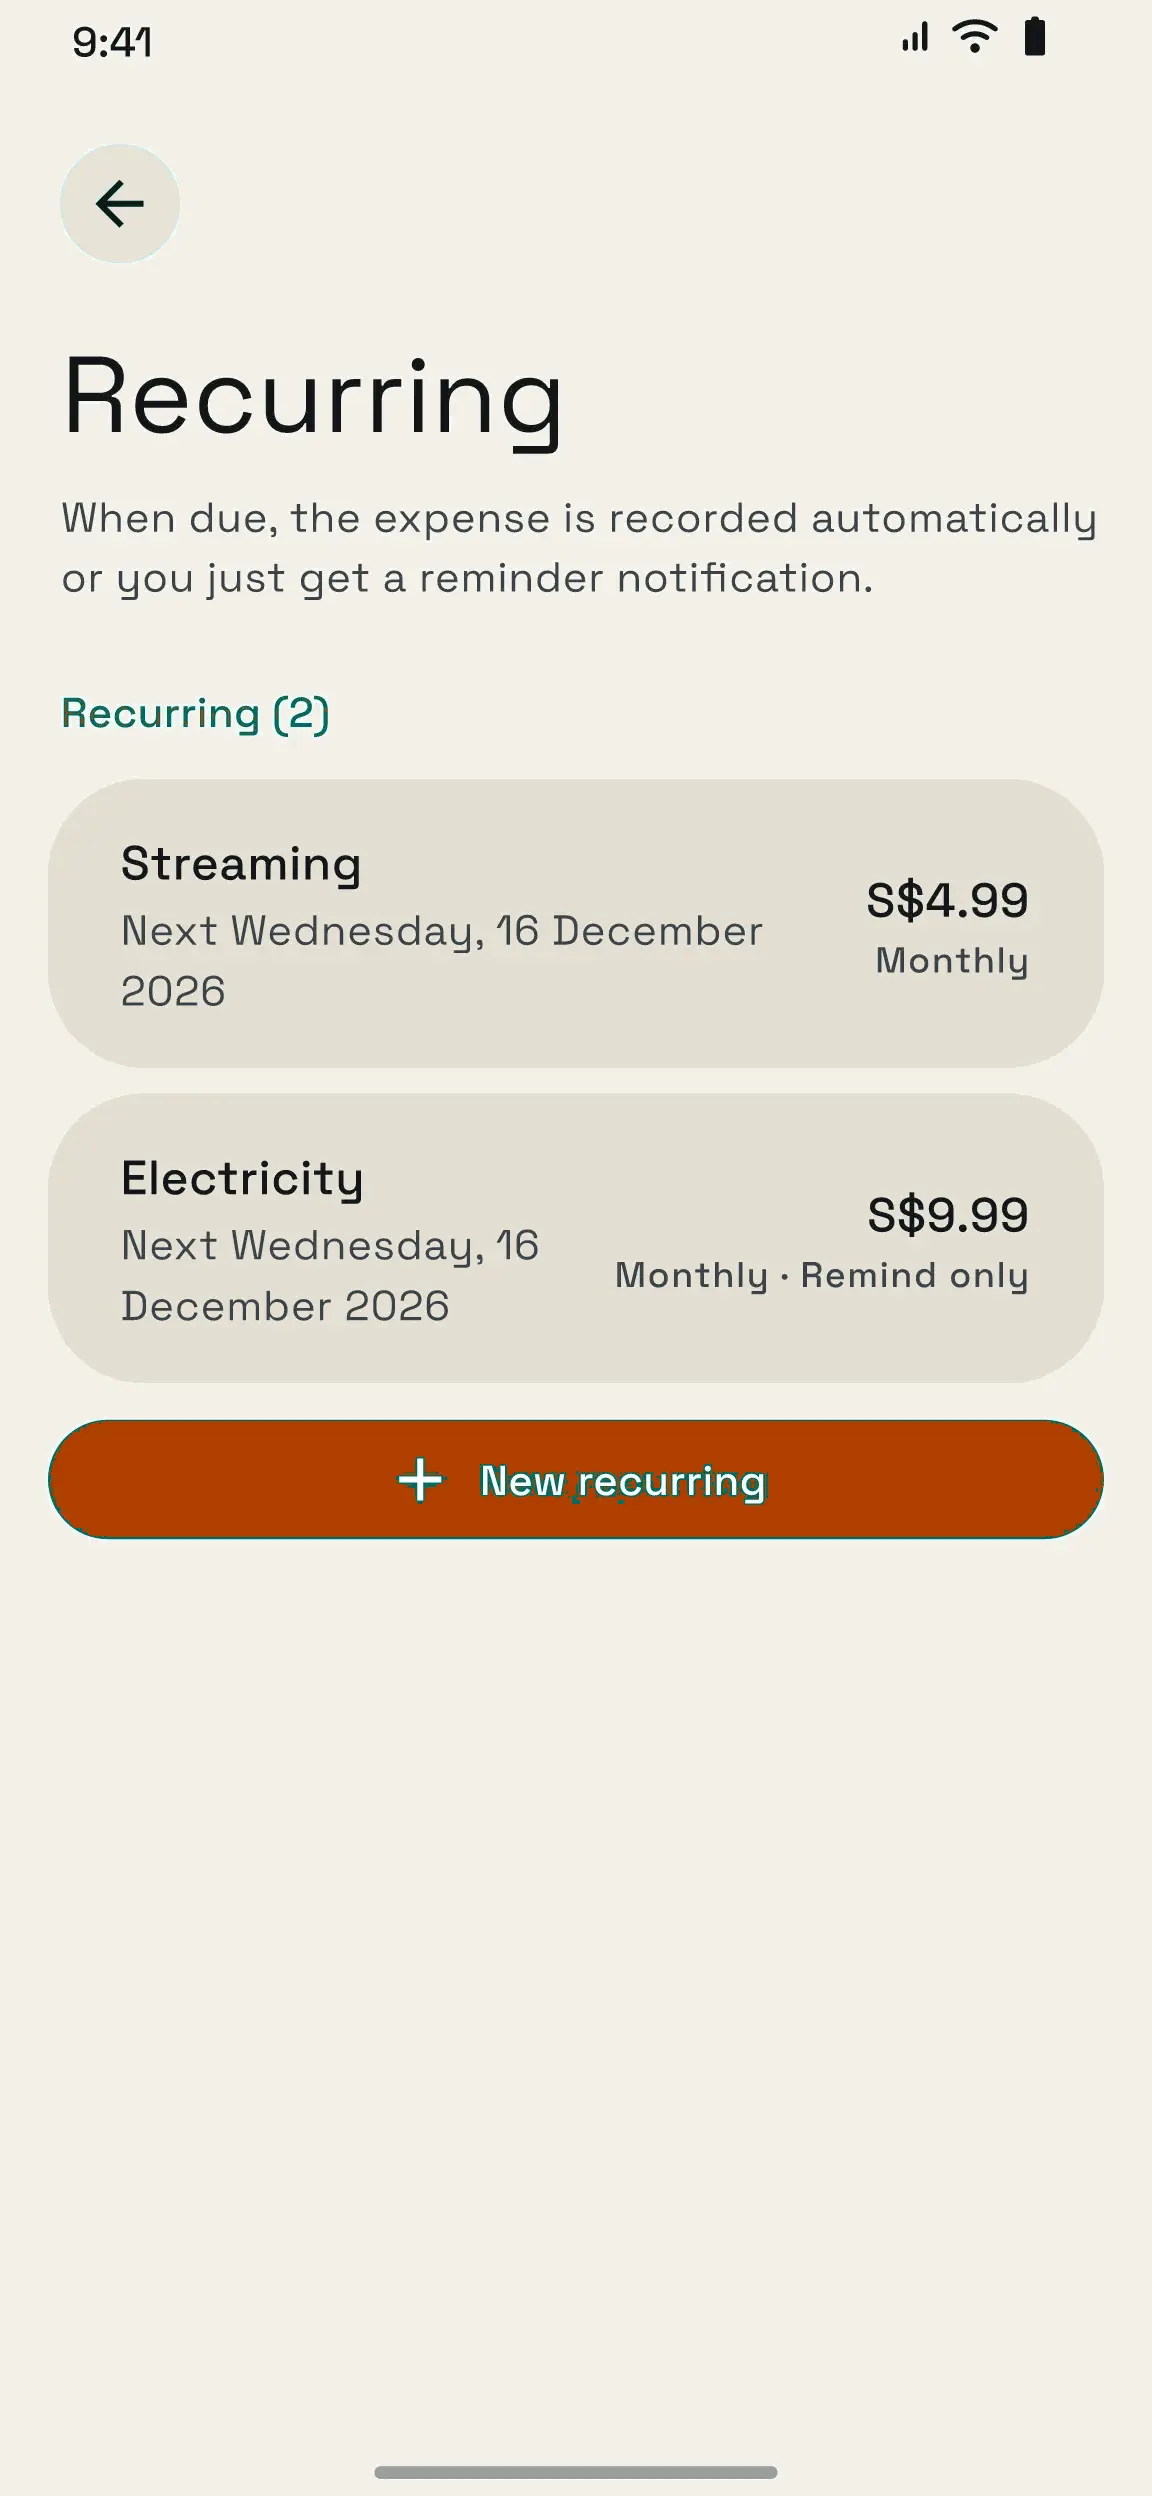
Recurring is for subscriptions and bills. When one is due, the expense is recorded automatically, or you only get a reminder, whichever you chose.
8. Make it yours
Appearance
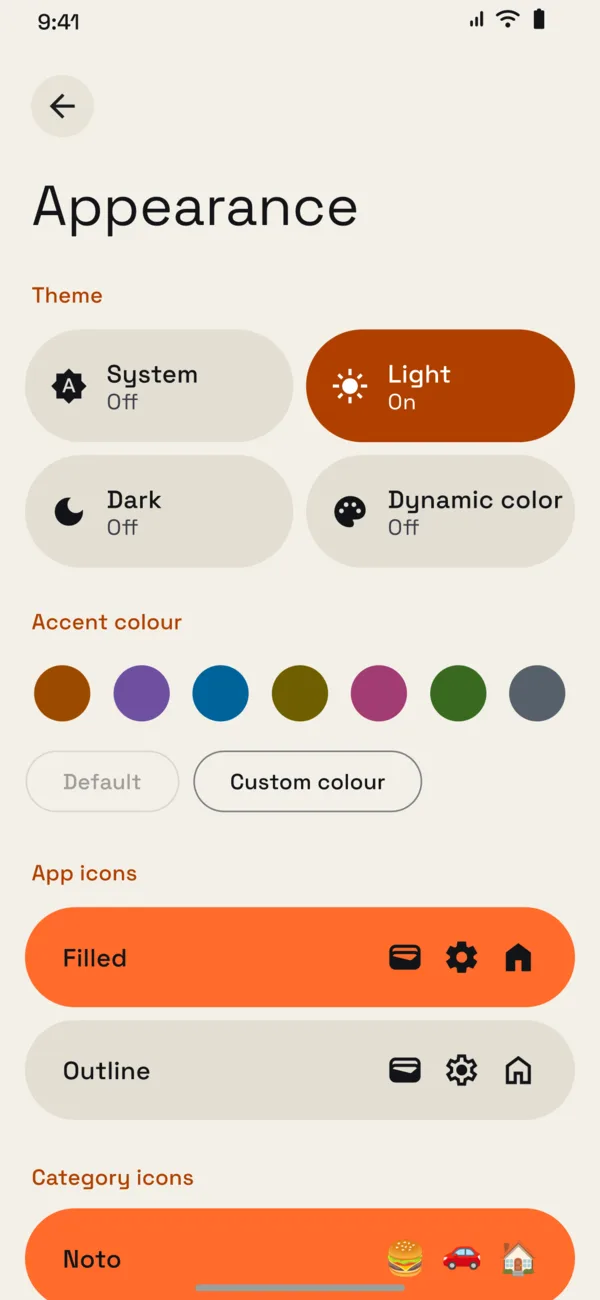
Appearance sets the theme (System, Light or Dark), Dynamic color, an accent color and the icon style.
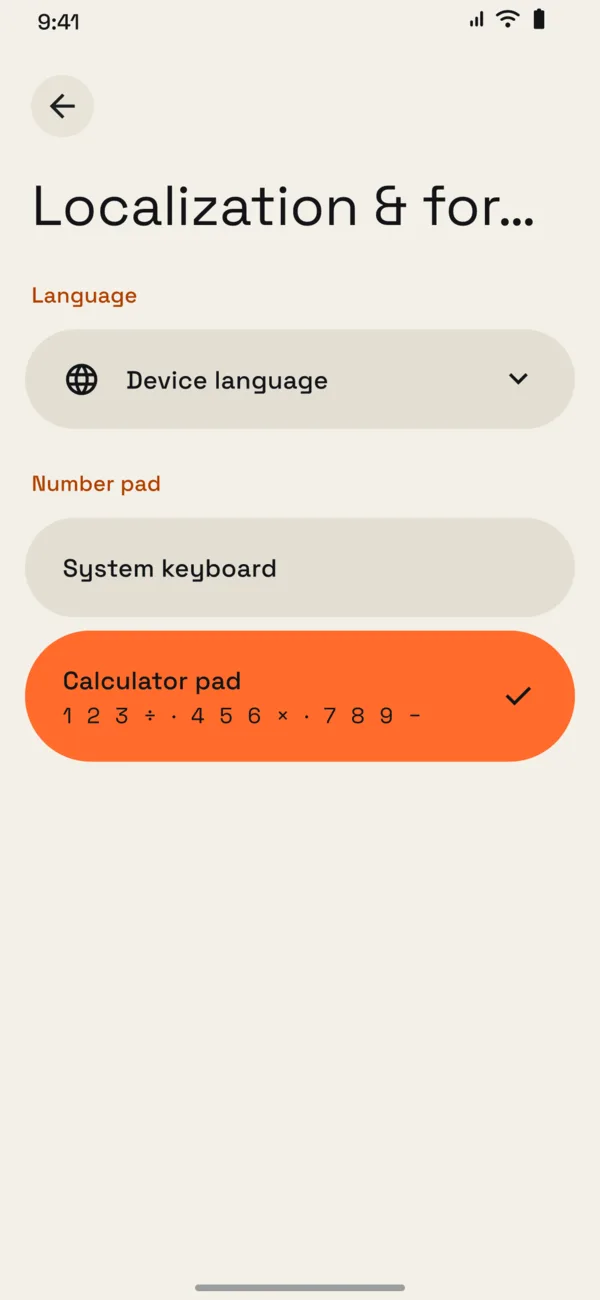
Localization
Localization sets the app language and the number pad.
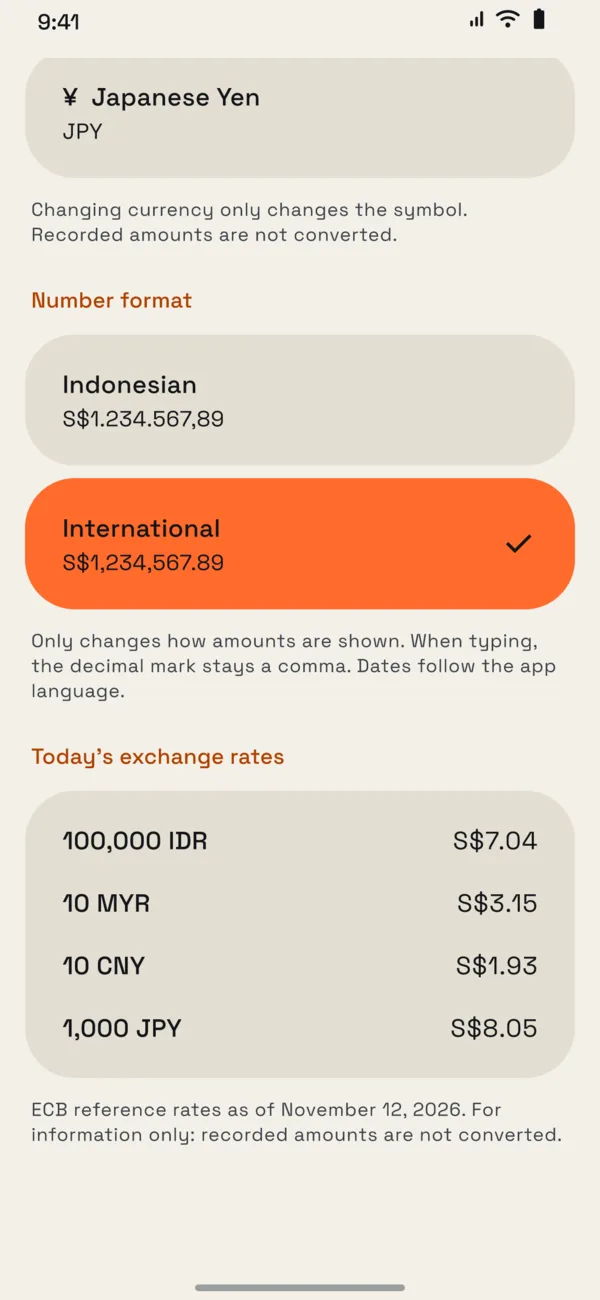
Region and currency
Region & currency sets your country, currency and number format, with today's reference exchange rates for information. Amounts are never converted for you.
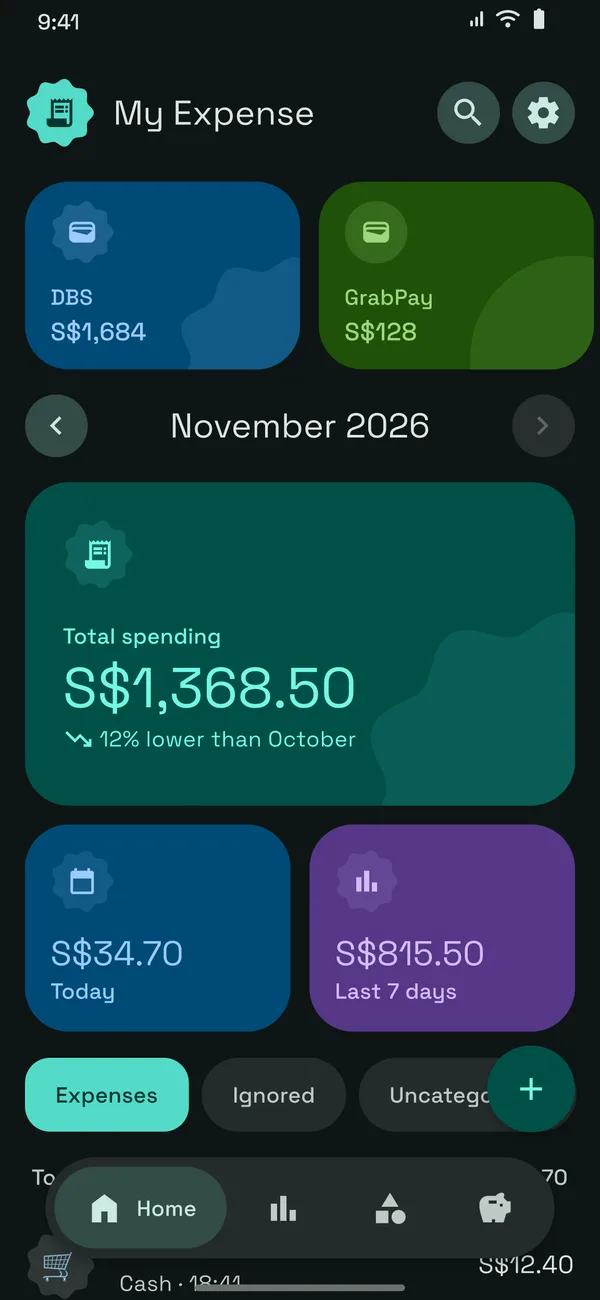
Dark theme
Every screen follows the theme you chose, here Home in the dark theme.
9. Ask AI about your spending
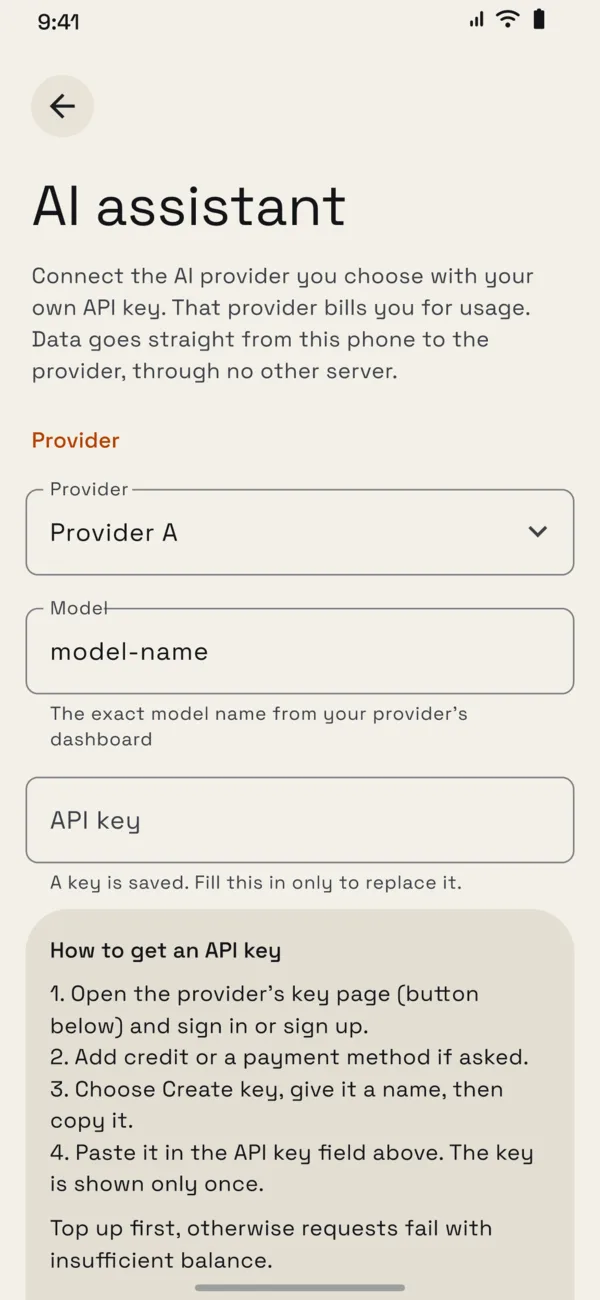
Connect your AI provider
AI is optional and off until you add your own API key. Open Settings, then AI assistant, and fill in:
- Provider: pick a preset, or Other for any service with an OpenAI-compatible endpoint.
- Base URL: the endpoint address. It must start with https://.
- Model: the exact model name from your provider's dashboard.
- API key: kept encrypted on this phone only and left out of every backup.
- Tap Save & test connection. The How to get an API key card walks you through creating one. The provider bills you for usage.
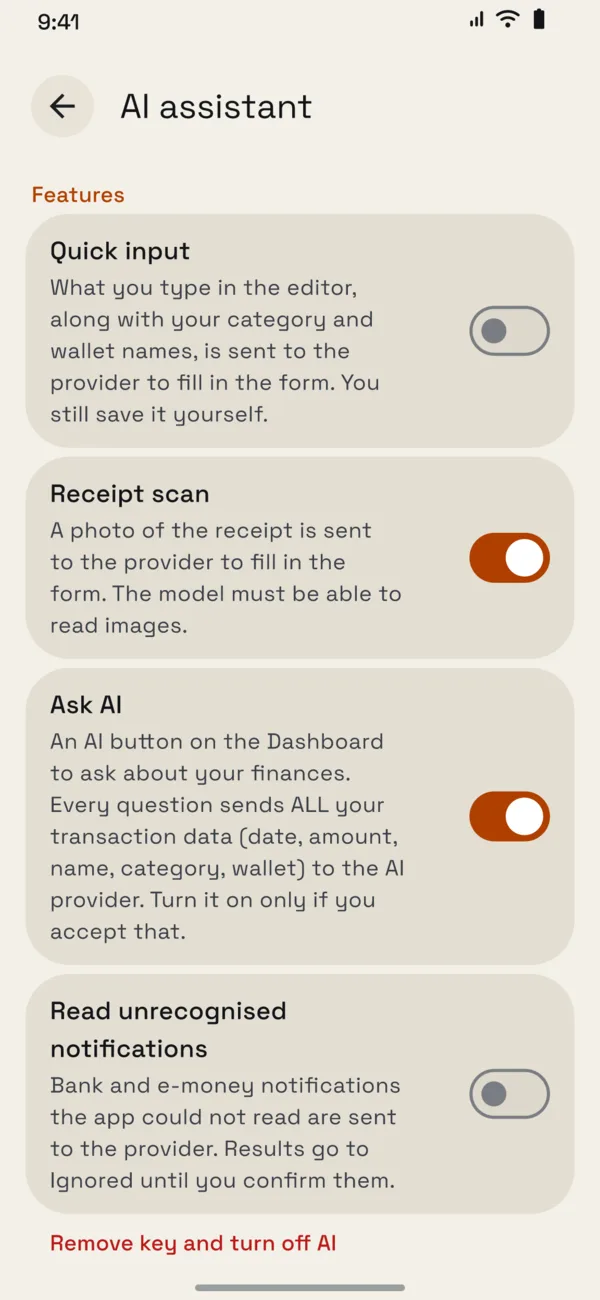
Choose what AI may do
Each feature has its own switch and is off by default. Scroll down to Features:
- Quick input: the sentence you type in the editor, with your category and wallet names, fills the form for you. You still save it.
- Receipt scan: a photo of a receipt fills the form. The model must be able to read images.
- Ask AI: adds the AI button to the dashboard. It sends all your transaction data with each question (see What is sent below).
- Read unrecognised notifications: bank and e-money notifications the app could not read are sent to the provider. The result goes to Ignored until you confirm it.
- Remove key and turn off AI deletes the key from the phone and switches every feature off.
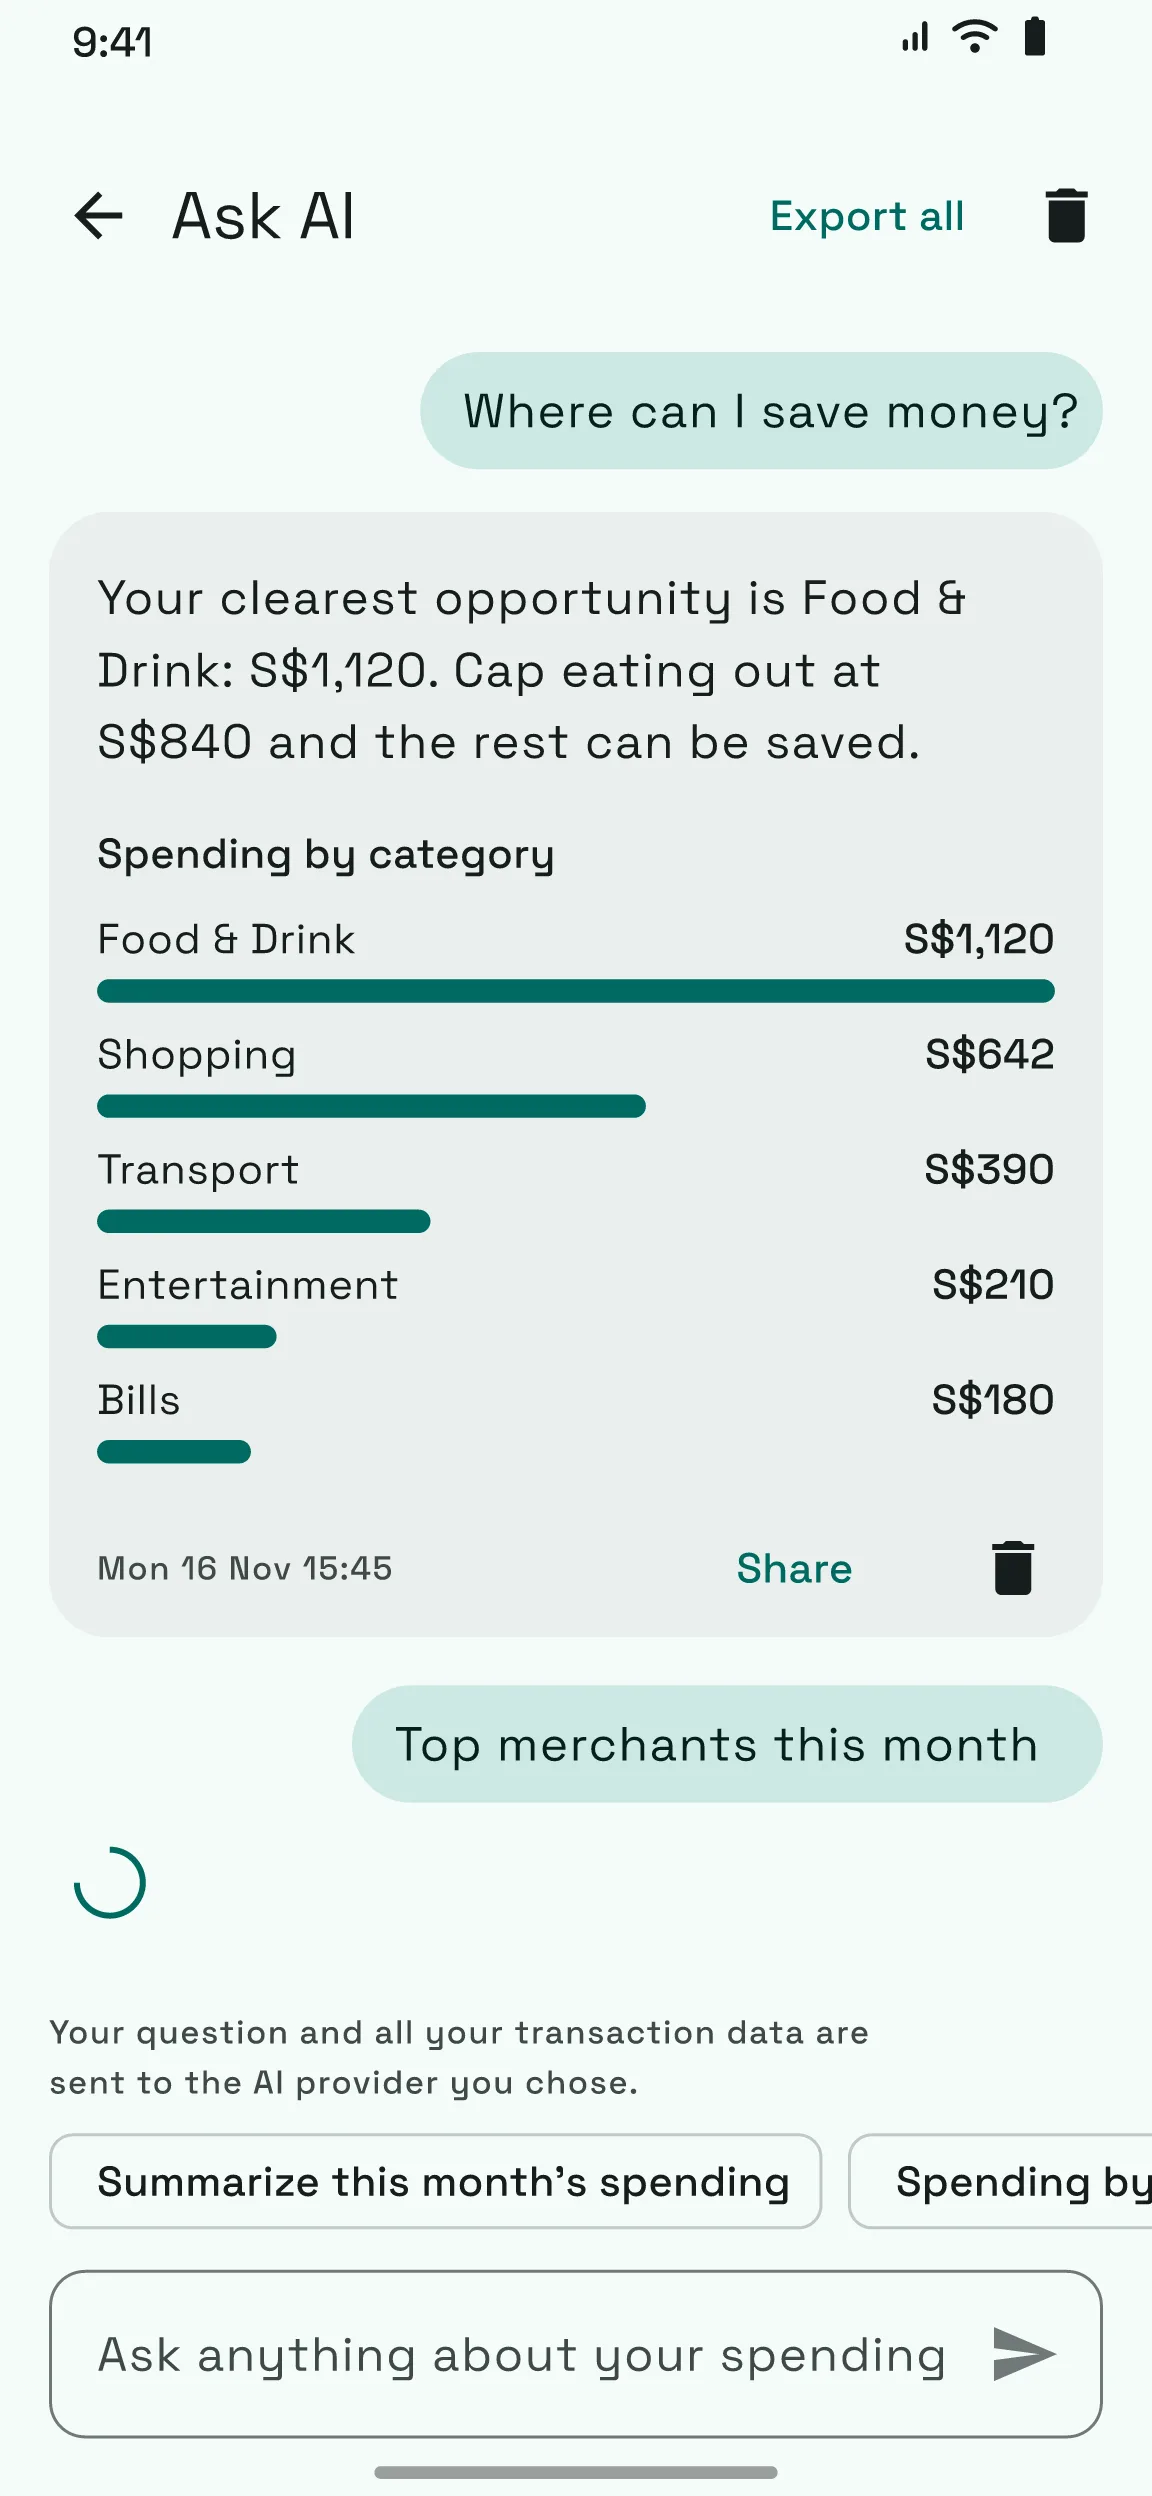
Ask a question and use a prompt
Tap the sparkle button on the dashboard. Type any question about your money, or tap a ready-made prompt to fill the box. You can edit it before you send.
The answer is plain text, or text with a chart, and is saved in the history. This one is a bar chart: it compares items side by side.
- Summarize this month's spending
- Spending by category this month (donut chart)
- Spending trend for the last 6 months (line chart)
- Merchants I spend the most at (bar chart)
- Where can I save money?
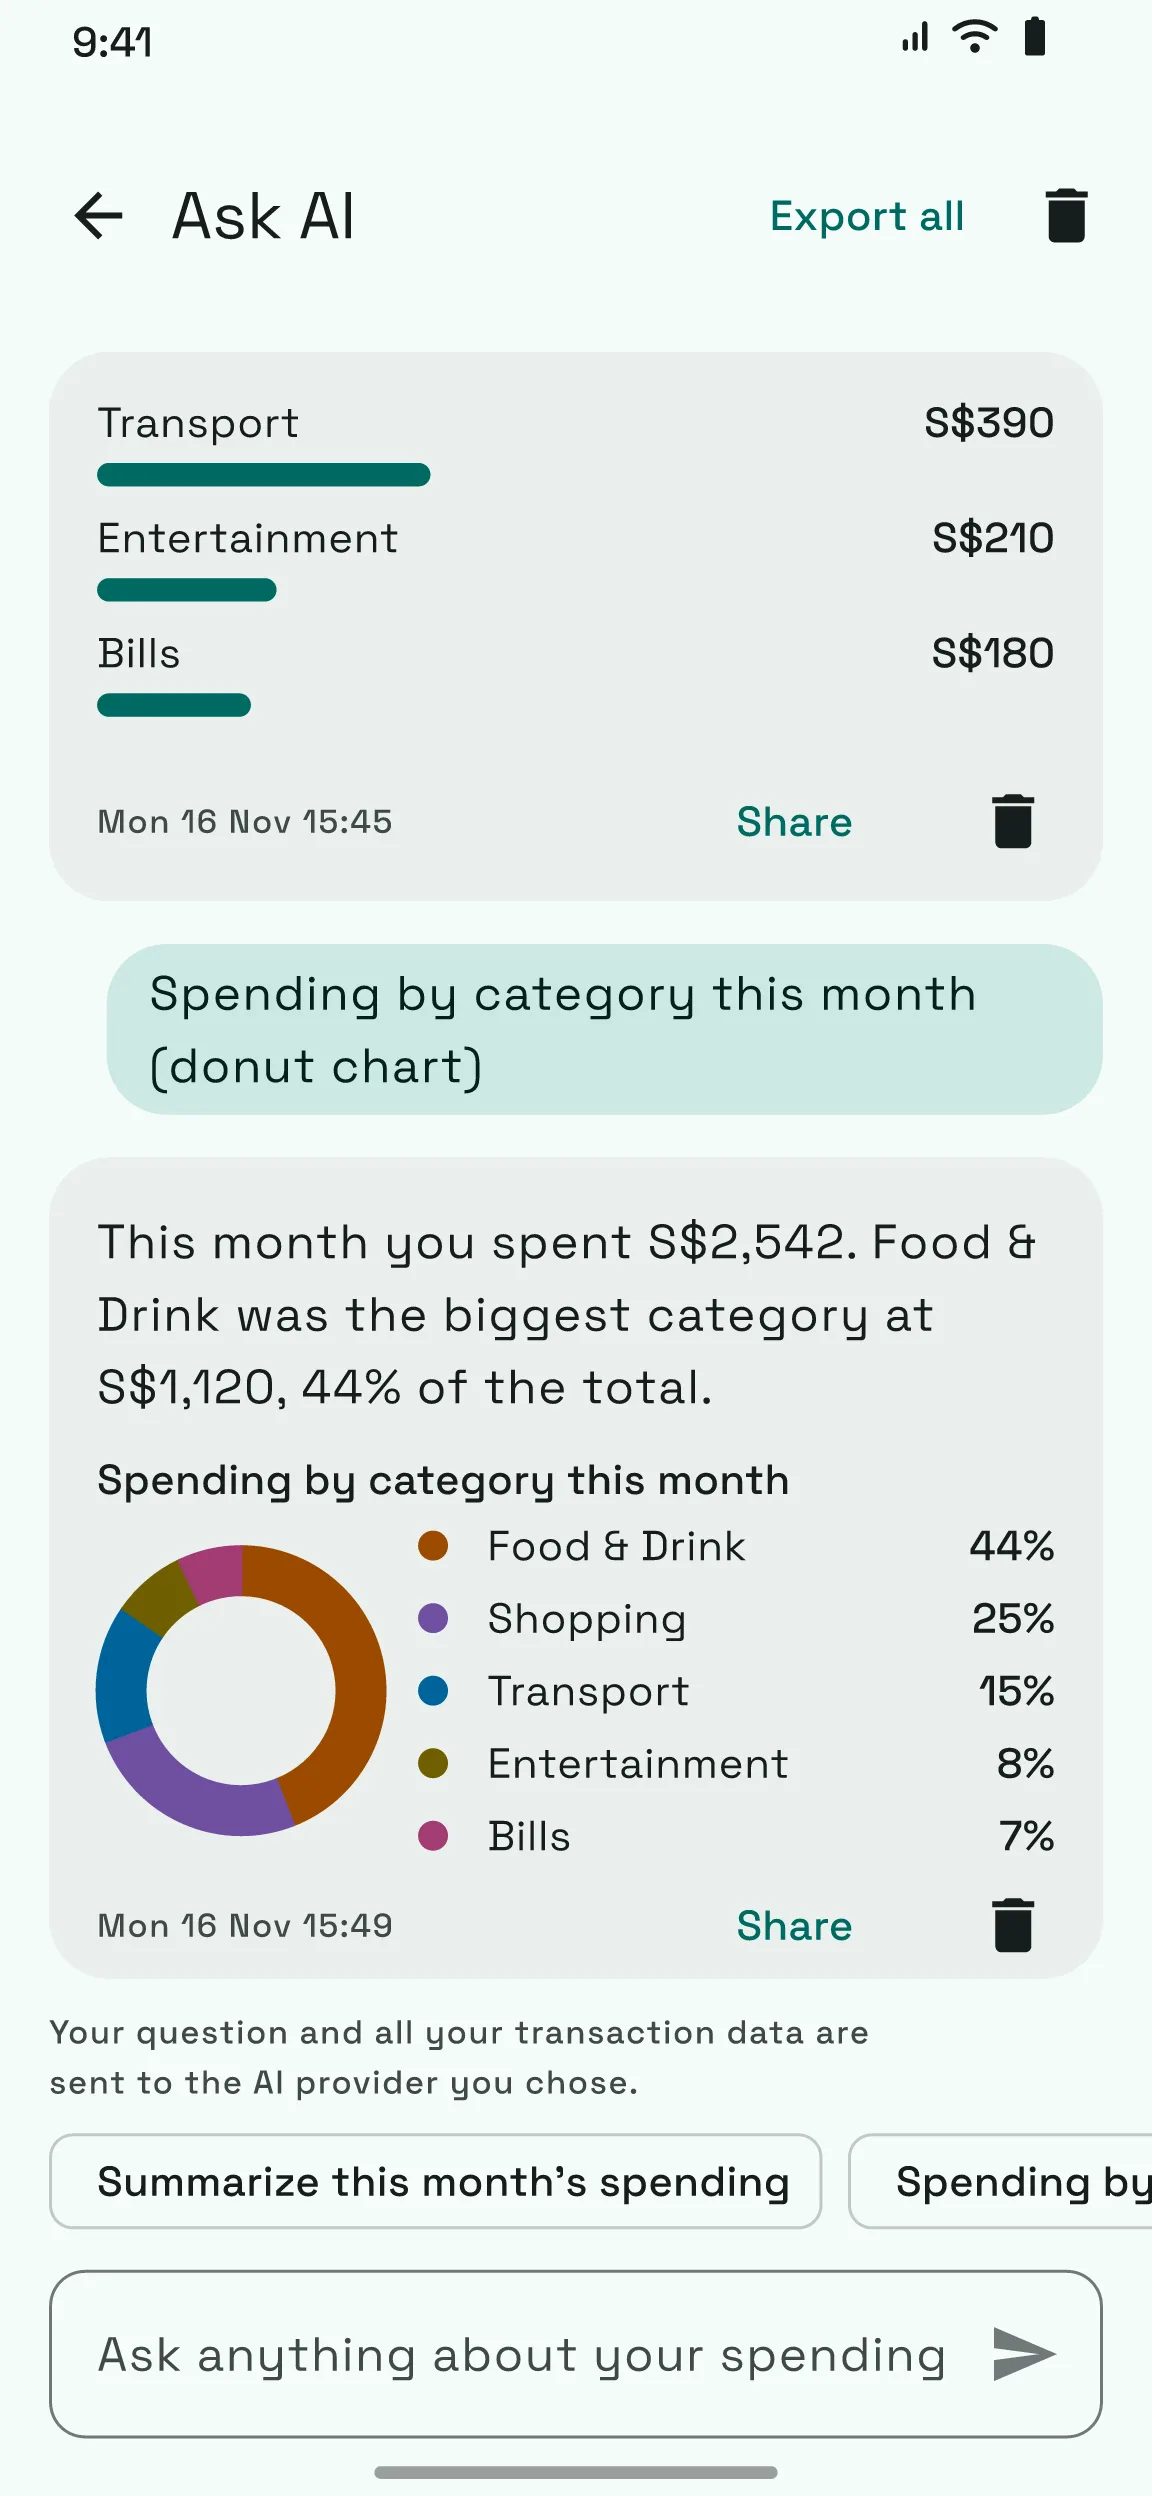
Donut chart
A donut chart shows the share of a whole, such as spending by category. Each slice has a color and a percentage.
Add the type to your question, for example (donut chart). Without it the AI picks the chart that fits, or none.
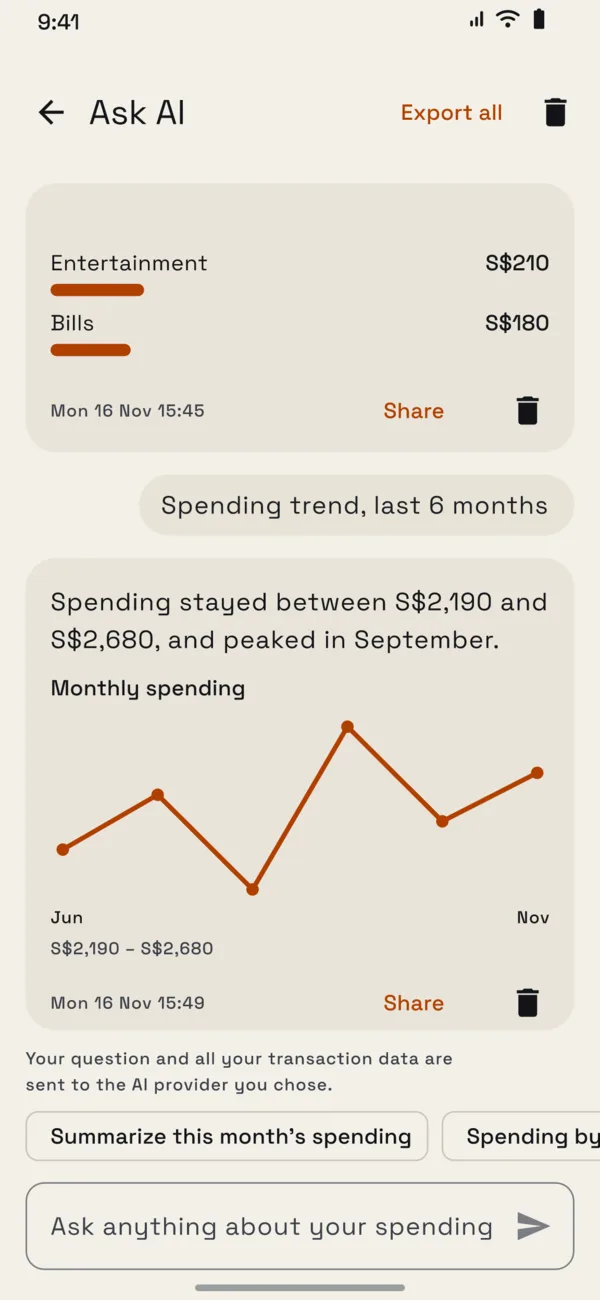
Line chart
A line chart shows change over time, such as the last six months. Under the line you see the first and last label and the lowest and highest value.
What is sent
Ask AI sends this to the provider you chose, straight from your phone and never to us, with every question:
- Your question and today's date.
- All your transactions: for each one the date, amount, currency, name, category, wallet and source. If you have more than 2,000, the newest 2,000.
- Not sent: notification text, photos, your API key (apart from signing the request) and your app settings.
- Read that provider's privacy policy first. The chat screen repeats this warning.
History and export
Questions and answers stay on your phone, behind the app lock and inside your backups.
- Share sends one answer as plain text, a chart as its label and value lines. Export all sends the whole history.
- The bin on an answer deletes it. The bin at the top clears the whole history. Both ask you to confirm.
10. Back up, lock and extras
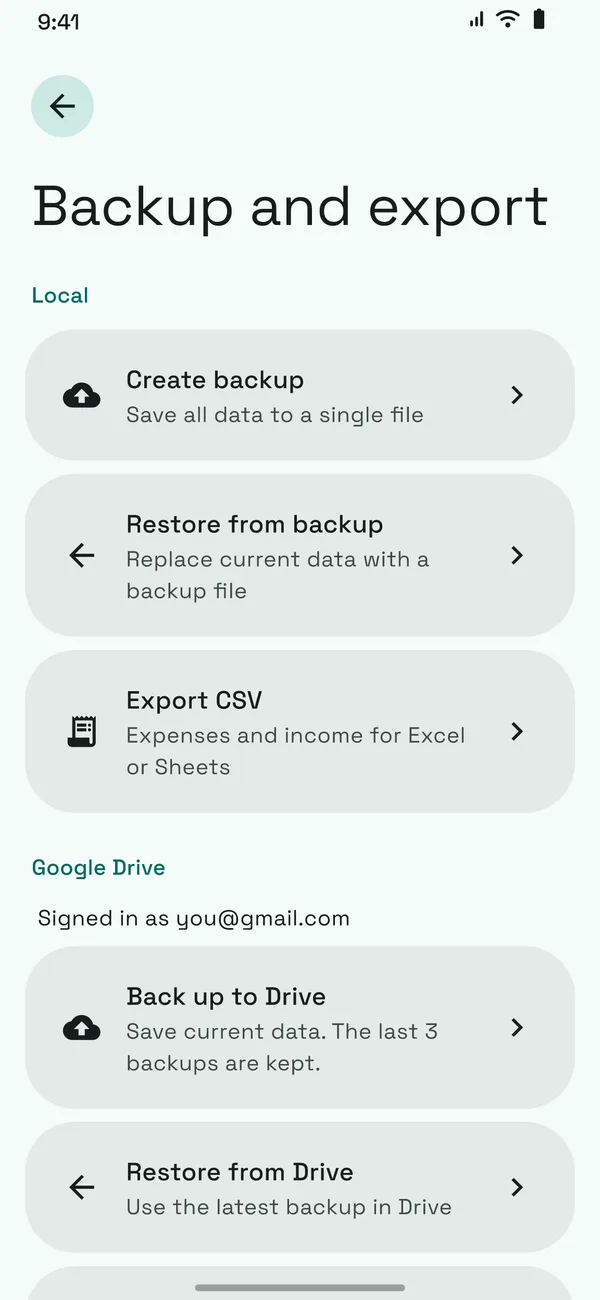
Backup and export
Backup and export can save everything to one file, restore it, export CSV for a spreadsheet, or sync with your own Google Drive. The last three Drive backups are kept.
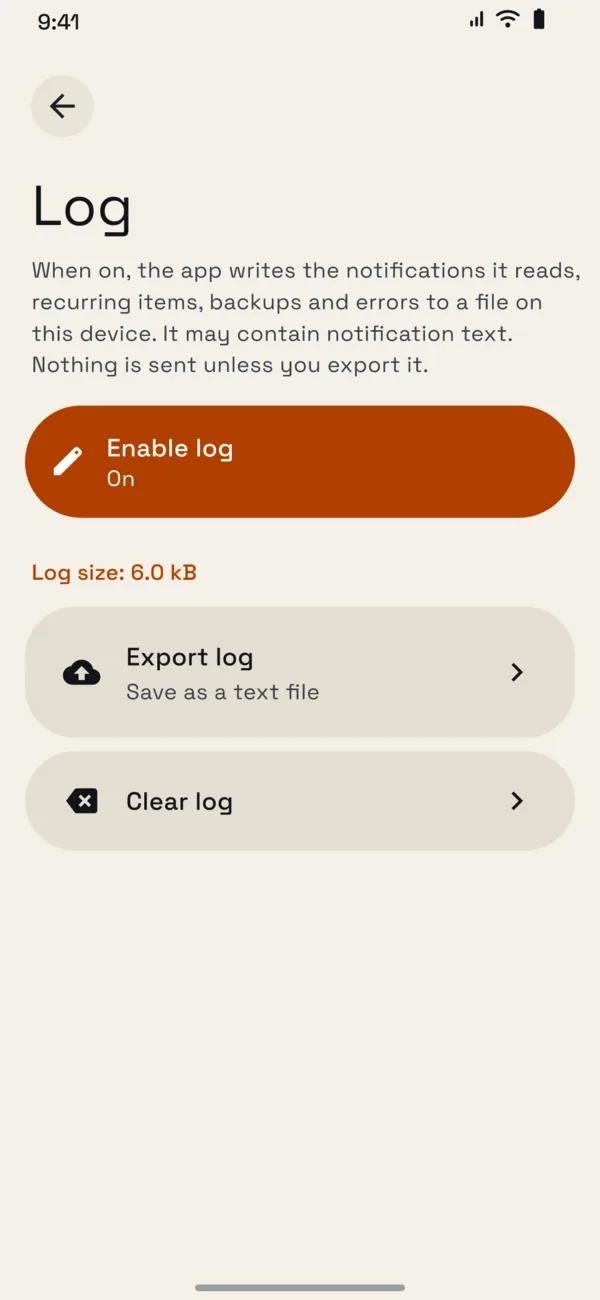
Log
Log is off until you enable it. It records the notifications the app reads, recurring items, backups and errors on the phone, and only leaves the phone when you export it.
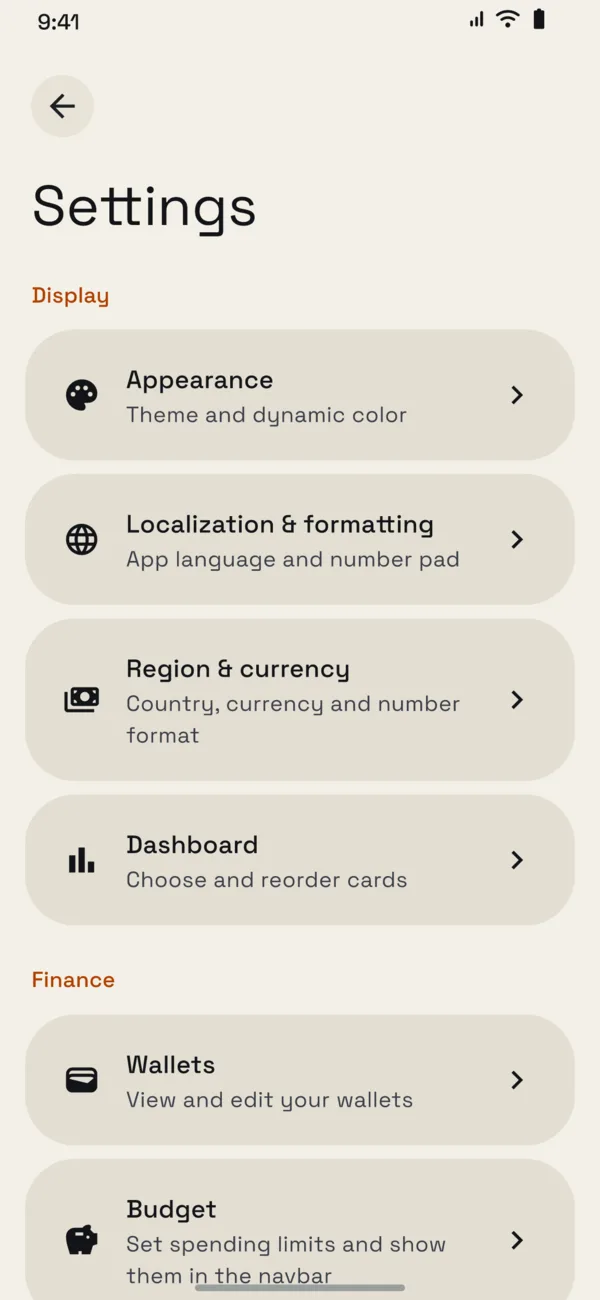
Settings hub and app lock
Settings is the hub for every page in this guide. It also holds App lock, which asks for your face or fingerprint when you open the app.
11. Feedback and licenses
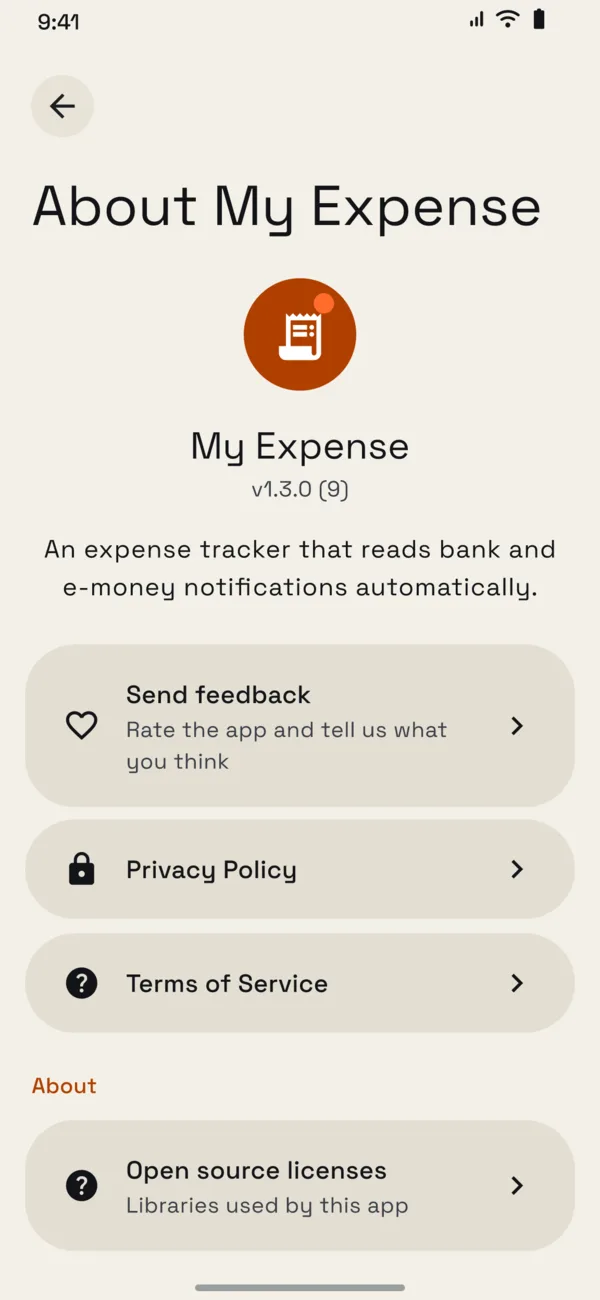
About
About shows your version and links to the privacy policy and terms.
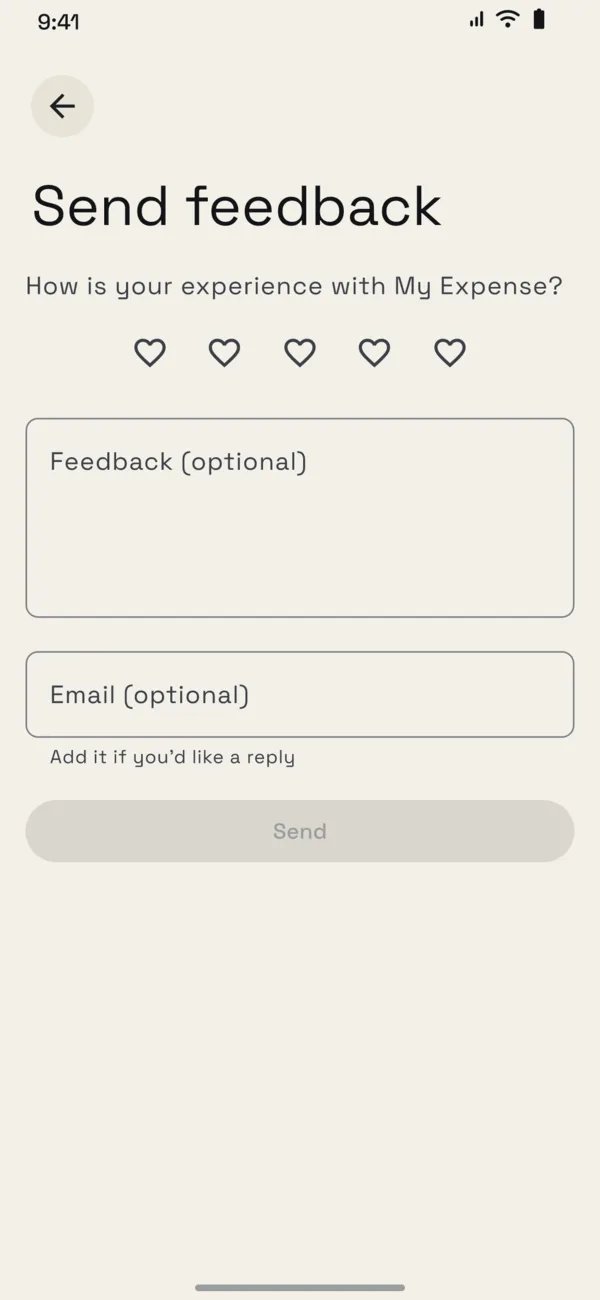
Send feedback
Rate the app and leave a message. An email is optional and only needed if you want a reply.
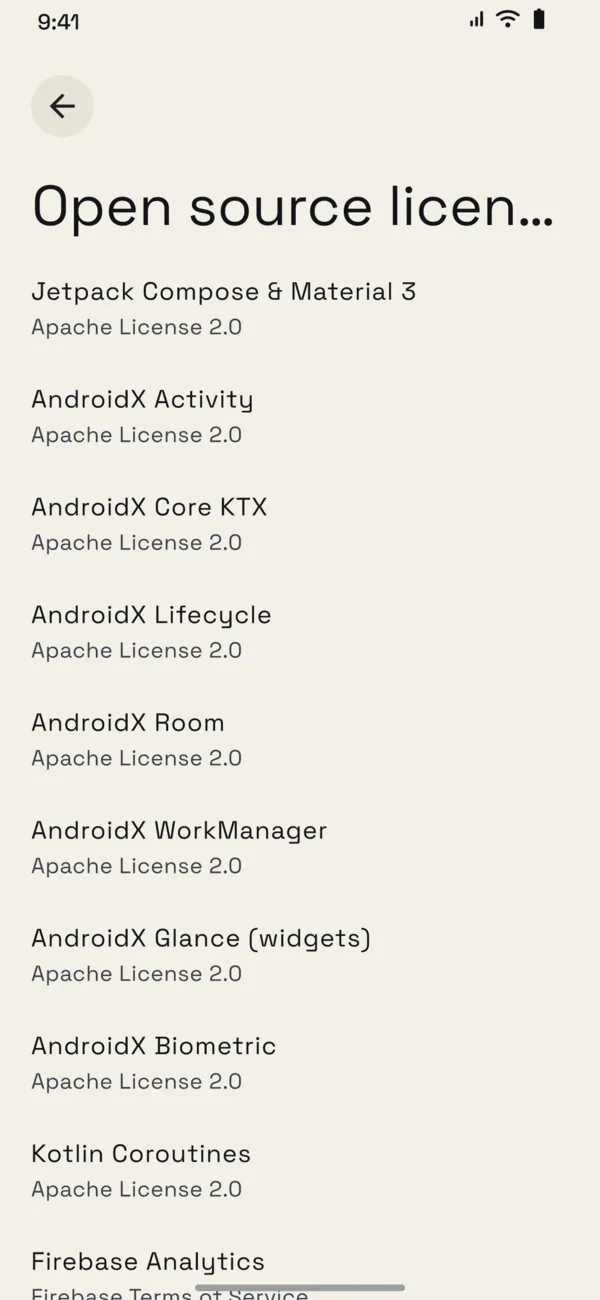
Open source licenses
The licenses of the open source libraries the app uses.
Stuck? Read the Q&A.